How to add a carrier and associate it with all products
The COVID-19 crisis is creating new logistics needs for many of you. Many of you need to quickly change carriers because your usual delivery company is no longer able to ensure your deliveries.
Creating a new carrier only takes a few minutes in PrestaShop, but associating it with all or some of your products is a real problem and a waste of time, as you have to do it card by card.
Thankfully, you can do it in one click with the Merlin Backoffice Flex module. There have been so many requests for this that we've decided to put together a special tutorial as a matter of urgency.
How to add a new carrier in PrestaShop
It's pretty straightforward, at least at first:
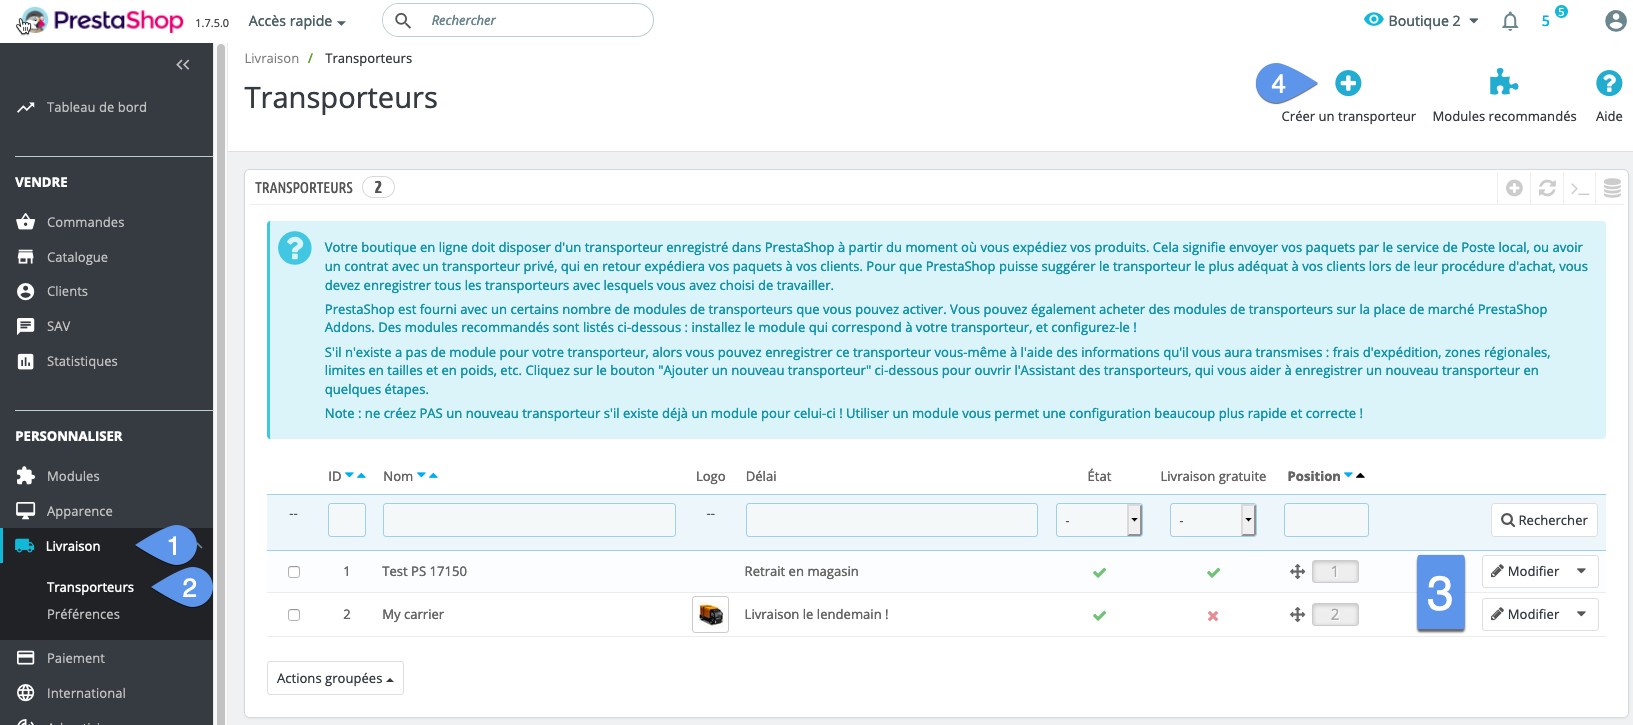
- Go to the "Customize" panel, then click on the "Delivery" menu.
- Click on "Carriers".
- The carriers already created and which you can modify from these buttons.
- Click on this + button to create a new carrier.
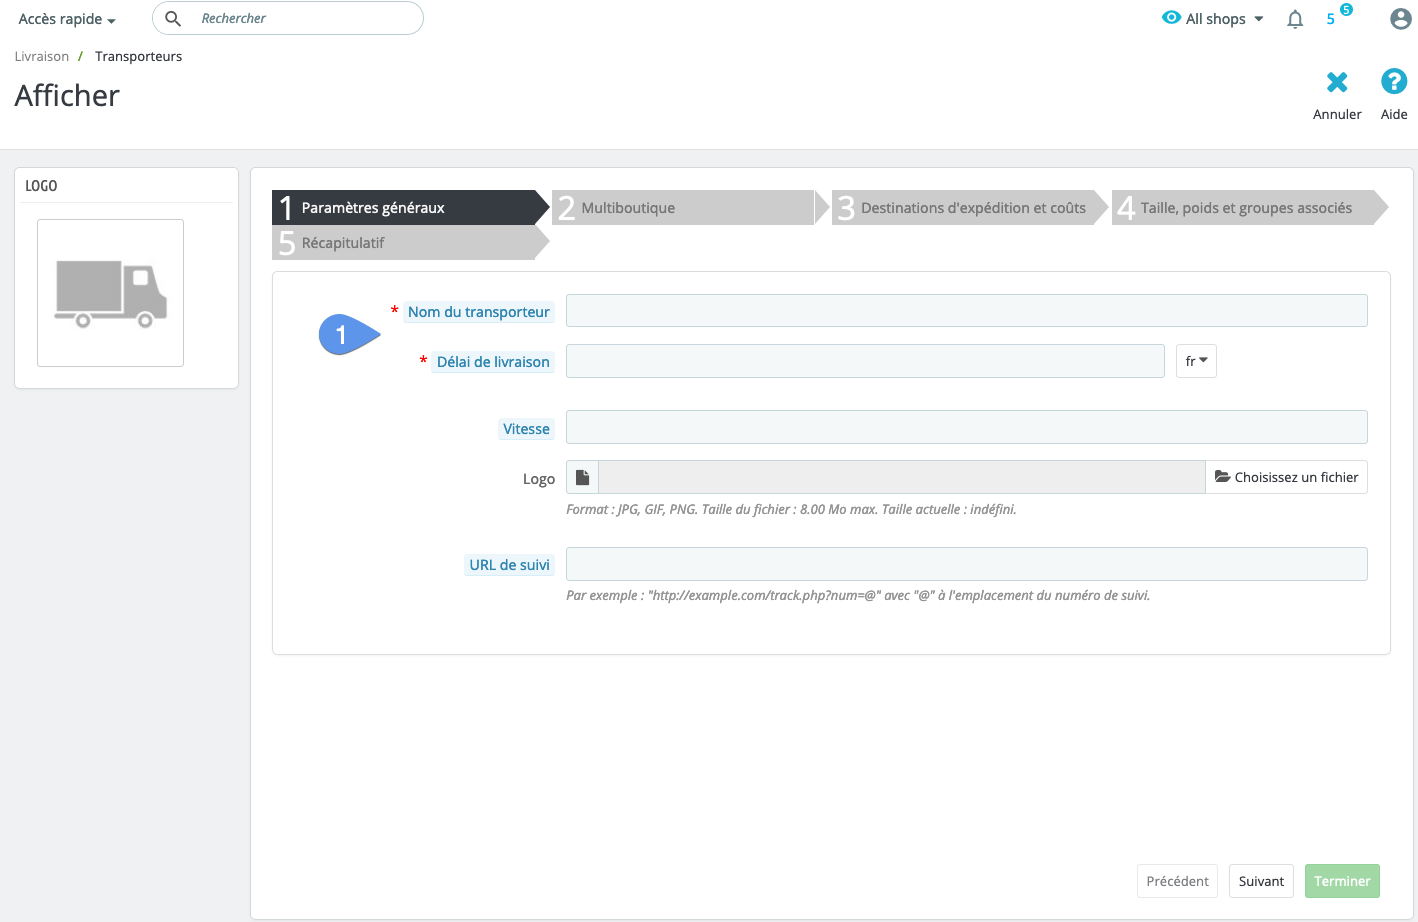
After that it's already a little longer and more complex, because you're going to have to:
- Of course give the carrier a name, a delivery time, a logo... but not only:
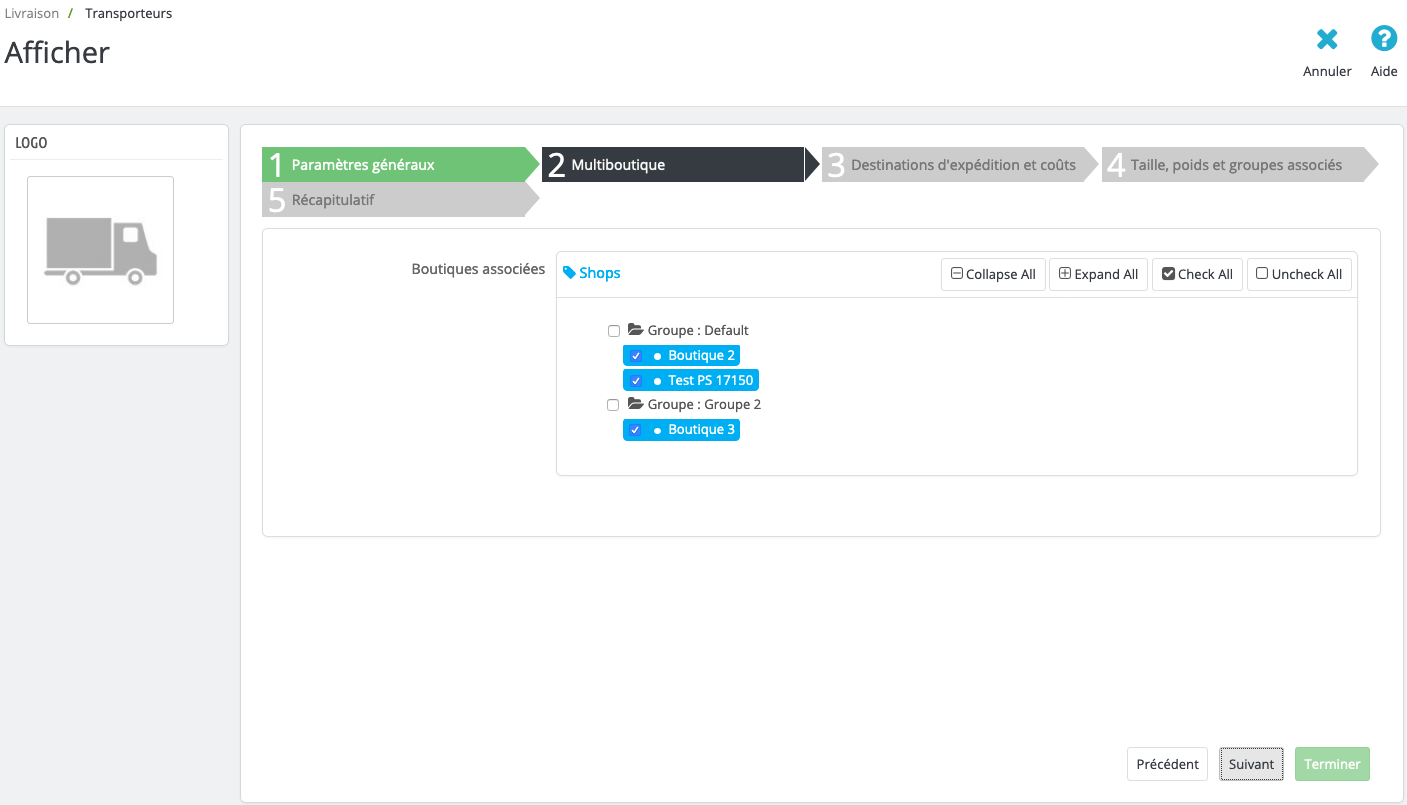
- It is also necessary to associate the carrier with the stores if you have activated this mode:
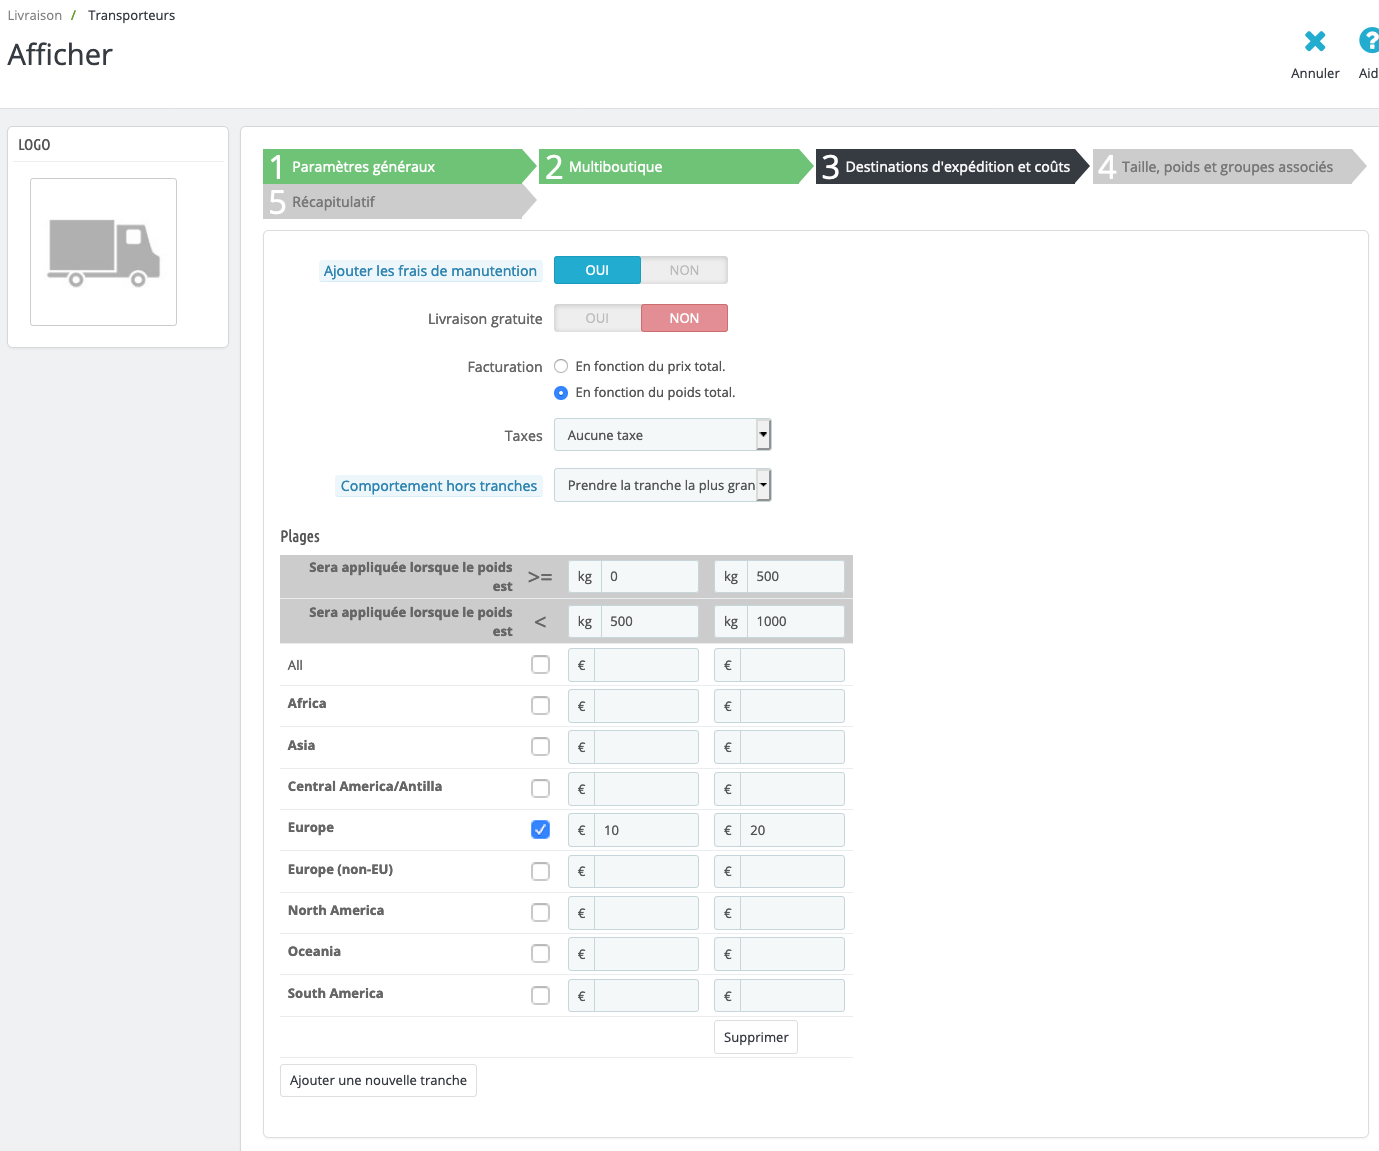
- Activating geographic zones and shipping costs for different weight ranges is really the most time-consuming step:
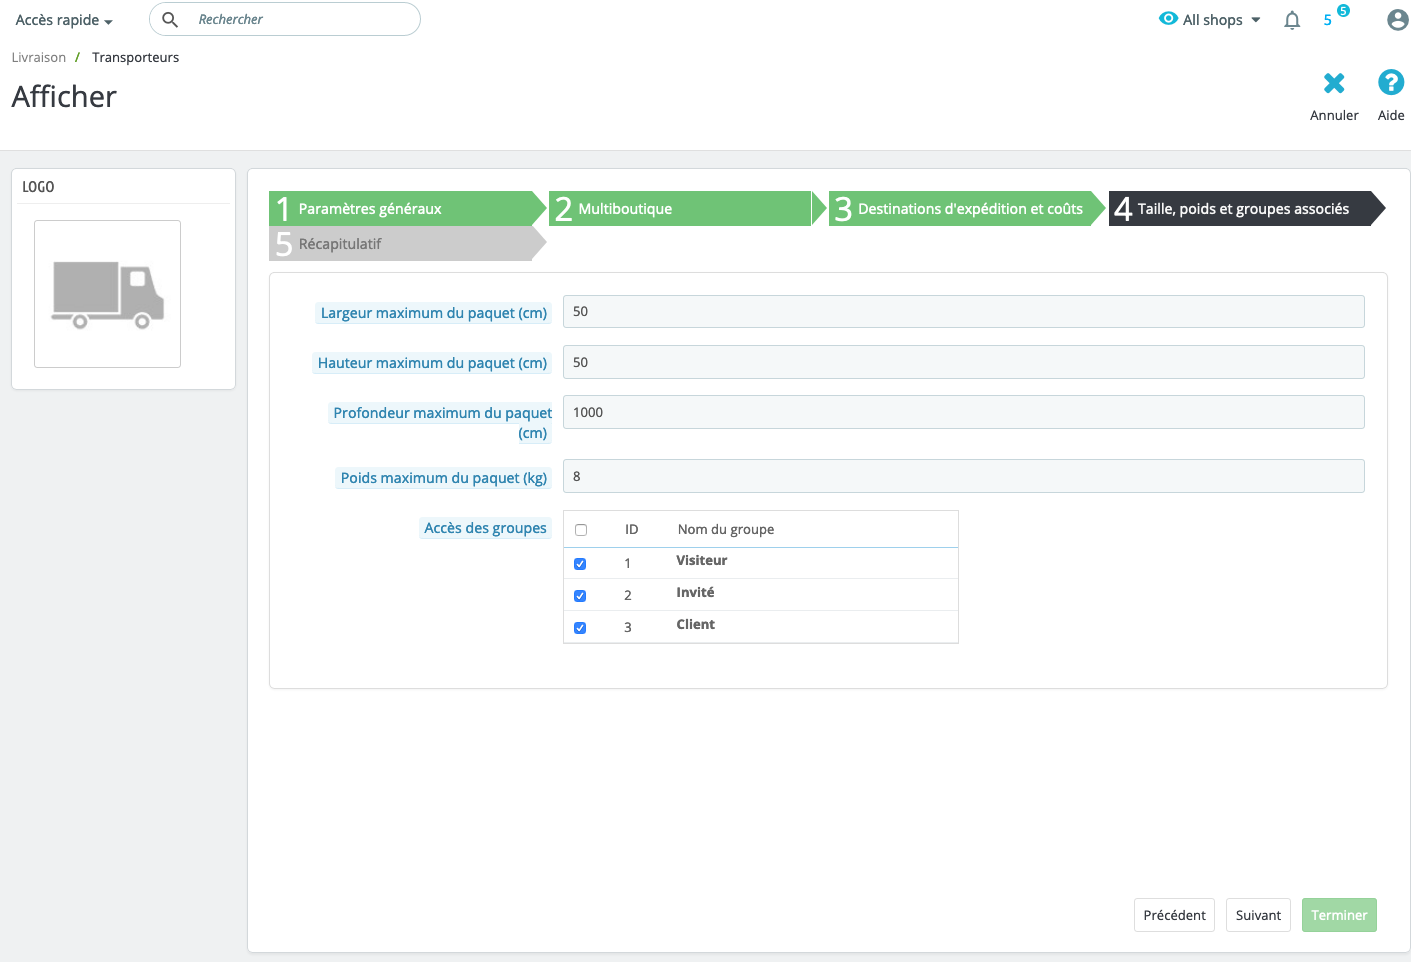
- Define the maximum dimensions and weight of packages accepted by the carrier and associate the groups of customers who can use this carrier, and finally activate the carrier:
Associate new carrier with products from PrestaShop
Two scenarios, one very simple, the other very complicated:
- All existing carriers are available for all products, without the slightest exception: you then have nothing else to do, as this is PrestaShop's default mode of operation. You're in luck.
- At least one of the carriers can't deliver one of your products. You'll have to associate the other carriers individually with this product. And then come and do it all over again for this new carrier. This is where the real hassle begins. It's not that it's complicated, but you have to do it card by card. Over 30 products, it's fine, but beyond that, you'll have lost your customers and your hair before you're done....
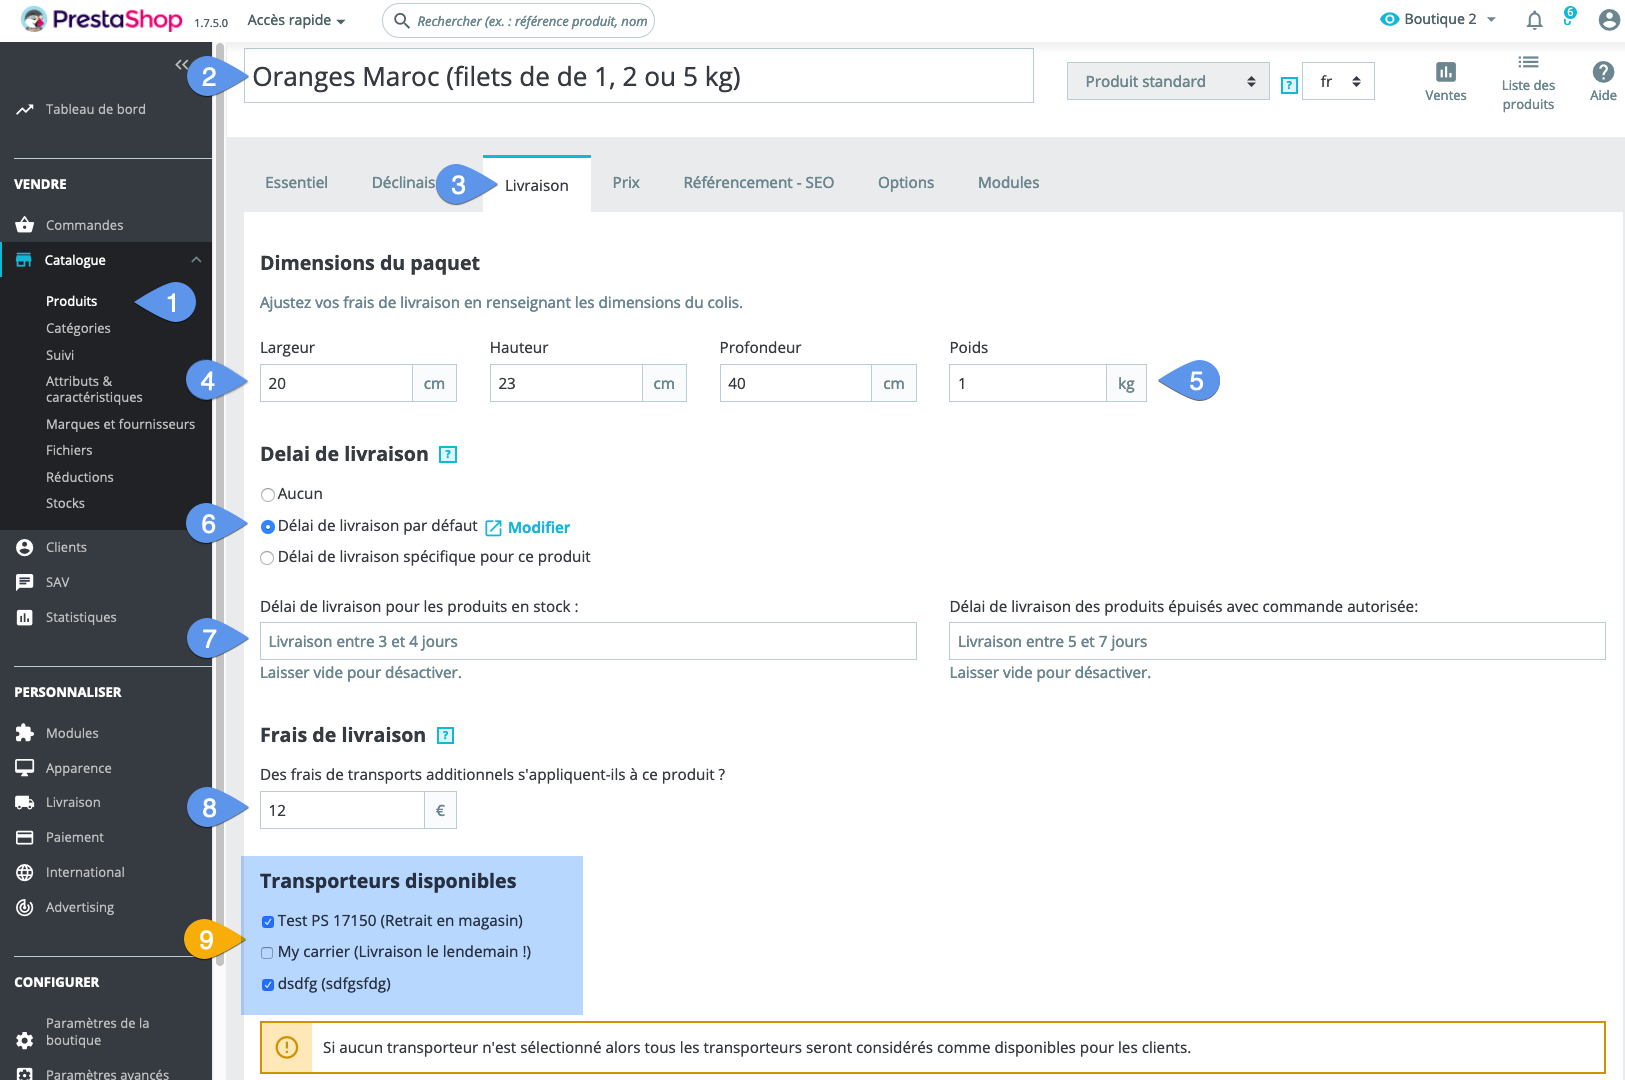
Fill in the delivery parameters for each product.
Let's move on to step 9, which must now be repeated for each product, unless none of the other carriers were already ticked (="all carriers usable"). Steps 3 to 8 fortunately only need to be done once, when creating the product (independent of the number of carriers):
- Open the catalog and then the products page
- Look for and open the product sheet.
- Go to the "Delivery" tab.
- Give your product a weight (remember also the weight impact of the various declinations if it has any).
- Choose the delivery time for the product, either the one defined by the carrier, or a specific time, or none.
- Choose the texts (or messages) displayed in the store when the product is in stock or out of stock. Leave blank to use the generic messages defined for the store.
- Additional shipping costs, which will be added to the shipping costs defined by the carrier choice.
- And finally, our last point, the very one we need to rectify when adding a new carrier, the association of the carrier with the product.
I'm sure you'll agree that it would be cooler to be able to do this in 6 clicks, regardless of the number of products. Stay with us, we'll show you how...
Associating a new carrier to all products with the Merlin Backoffice module
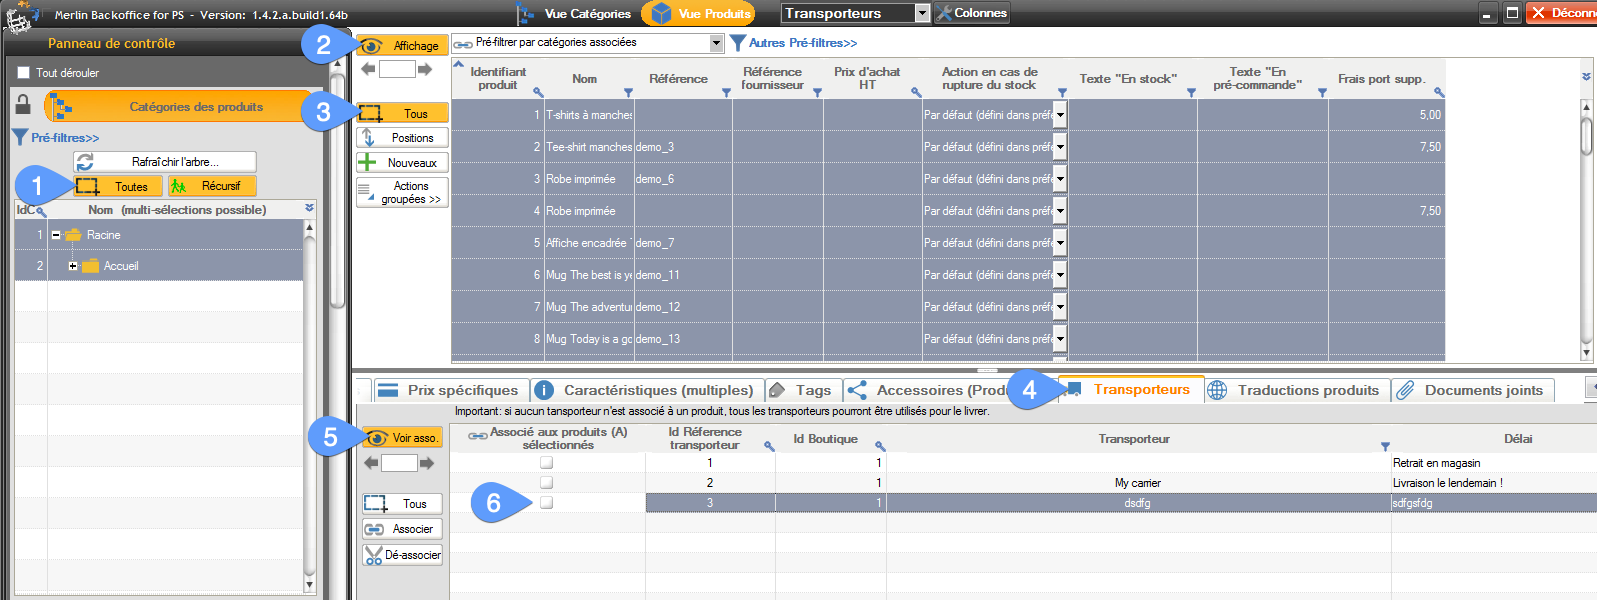
It really couldn't be simpler:
- Select all categories, in recursive mode (this takes sub-categories into account without having to unroll branches). Or of course only some of the categories if necessary.
- Click to display all products in the selected categories. If necessary set up a pre-filter if you wish to associate only part of the products.
- Click on "All" to select them all.
- Go to the "Carriers" tab. If this tab is missing, remember to switch the interface to "Complete" mode in the display settings.
- Click on "Voir asso." to display existing carriers and view current associations.
- A single click in this box instantly associates this carrier with all selected products. Note also that if you select several carrier lines before making this click, the association becomes a multiple cross-association.
Cross-associations between products and carriers and how to copy carriers from one product to other products (in French)
This very short video shows you in pictures the advanced use of this "Carriers" tab. You'll also learn about the color codes of the checkboxes, the alternative mode with the two buttons "Associate" and "Disassociate" and we'll tell you about upcoming developments in the tool, such as the creation of new carriers from Merlin.
Accessorily this video also explains the use of the "Attached documents" tab, very similar.
Increase the resolution to 720p if the video is too blurry, replay it in Auto if it freezes.
Lose no more time associating your carriers. Use Merlin Backoffice Flex for free:
Category's other articles Mass management of PrestaShop products
-
How to mass-produce products in PrestaShop
How to
Creating products in PrestaShop one by one is a thankless and time-consuming task. Here's how to make your life a lot easier
-
How to apply a change to all products without displaying them?
How to
This very simple and very fast method allows you to modify all products without displaying them, using Sitolog Merlin Backoffice ™ PrestaShop addon
-
Three methods for enabling and disabling products
How to
Discover three ways to very quickly enable or disable a selection or all products by category, with the famous PrestaCategories PrestaShop addon
-
Management of custom fields in Prestashop
How to
Tutorial made of screen captures, showing how to configure Merlin Backoffice addon, to display and edit a custom column for any type of non standard field added by an external addon, override or code change
-
PrestaShop Product H2 SEO with ChatGPT
Trick
Automate the optimization of your product H2 tags in Prestashop using AI and Sitolog's Merlin Backoffice Flex
-
Mass edition of products on Prestashop to quickly associate the same value to a large number of products
How to
Here are pictures of how to make quick copy and paste in PrestaShop, or mass edition, to fill with the same value any property in a large number of products, with the MerlinBackoffice module
-
How to link an orphan product to a category?
How to
The solution using PrestaCategories or Merlin Backoffice addons to bulk repair all the orphan products of your PrestaShop in one click (assign a main category to all products without default category)
-
Prestashop accessories and related products module
Video
How to
Increase your sales by offering compatible accessories. Quickly create cross-associations between your products thanks to the Merlin Backoffice module, and its management of associated products | SITOLOG
-
PrestaShop and barcodes
Guide
Finally, a complete barcode management solution for your PrestaShop store.
-
How do I delete products from a csv that lists IDs?
Trick
We'll show you how to delete a product list from a CSV or Excel file in your PrestaShop store