How to associate products to PrestaShop (secondary) categories in bulk
Reminder : a product has one (and only one per shop) primary category (also named default category) and can have any number of secondary categories (also named linked categories).
In the front office, the product is listed in all linked categories.
Note: a product is automatically linked to its primary category.
In this post, we'll show you how to define secondary categories, meaning how to add products into or link them to categories, with PrestaShop, one product at a time and how to do it in bulk with Merlin.
Link a product to categories with PrestaShop
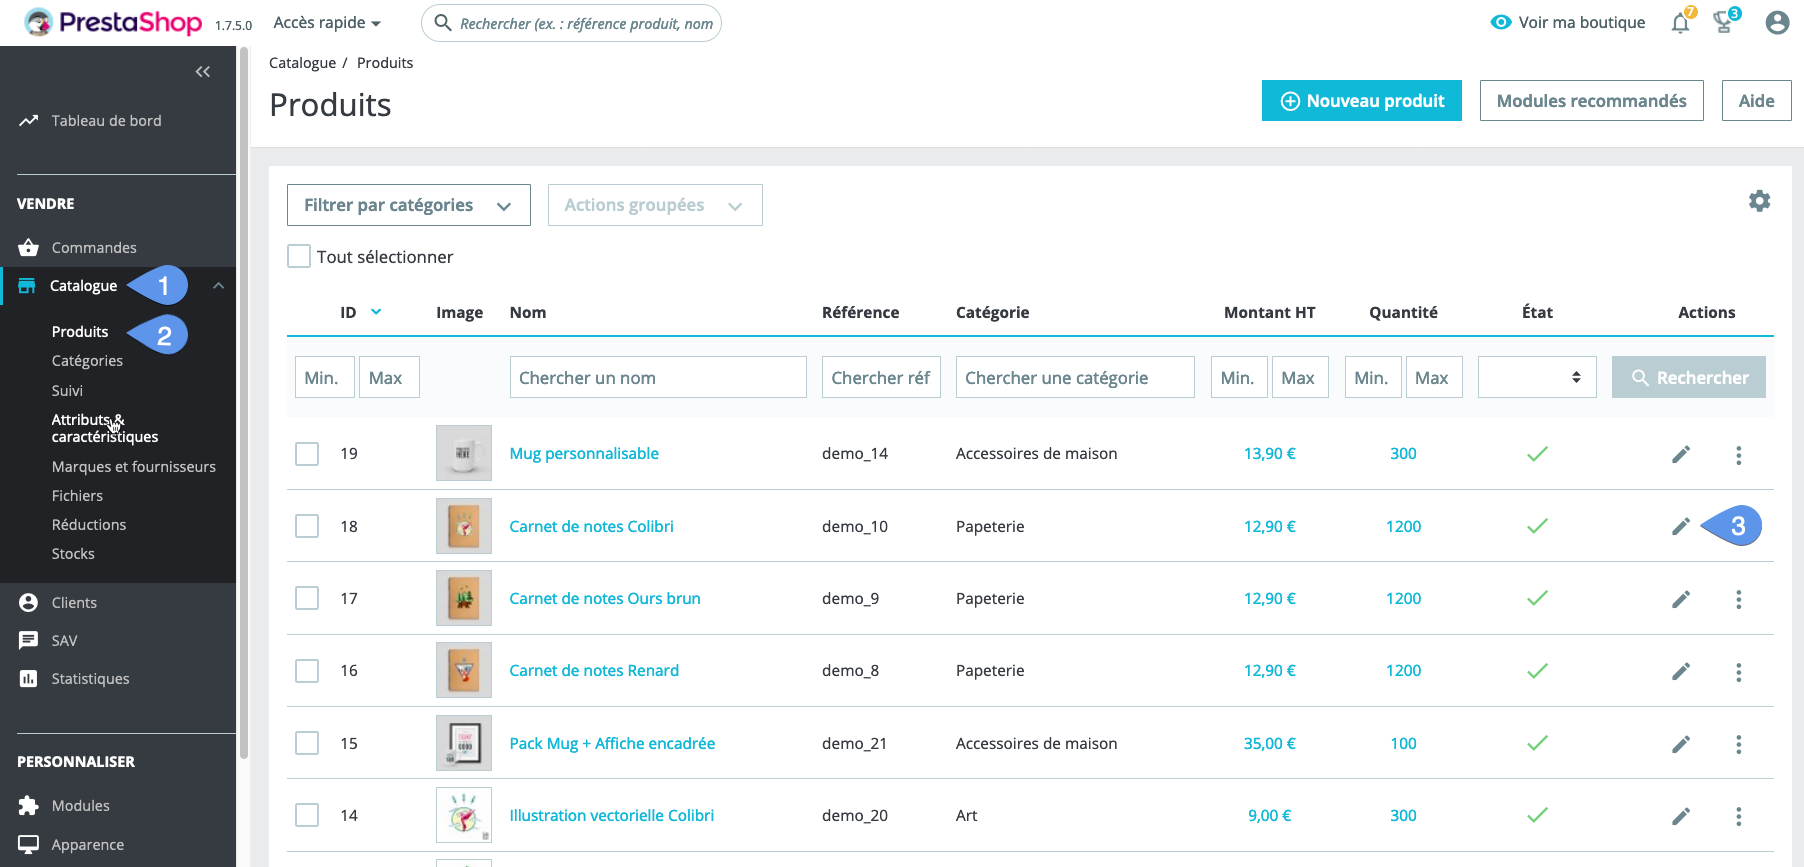
- Click on Catalog
- Click on Products
- Click on the pencil to edit the product:
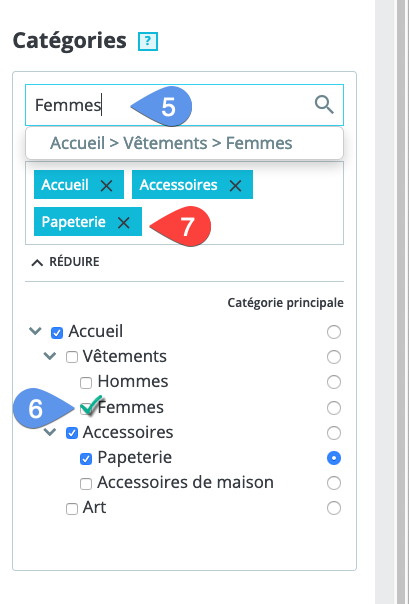
- With PrestaShop 1.6, go to the "Associations" tab. With PrestaShop 1.7, go down to the categories bloc in the right columns.
- Search the category.
- Turn on the check box to add the product in the category.
- Click on the cross label to unlink the product and the category:
The main disadvantage of this method is that it can operate on only one product at a time. If you have hundreds or thousands of products to categories associations to create or change, this will takes weeks.
Link multiple products to categories thanks to Merlin Backoffice ™
The first approach is not appropriated when you have a large number of products to add to categories. In this case you must use a mass edit software like Merlin Backoffice, to do these cross linkages much faster.
Here is a short extract of the Merlin Backoffice video training (in French), showing how to bulk link products to secondary categories :
Step by step operation using Merlin :
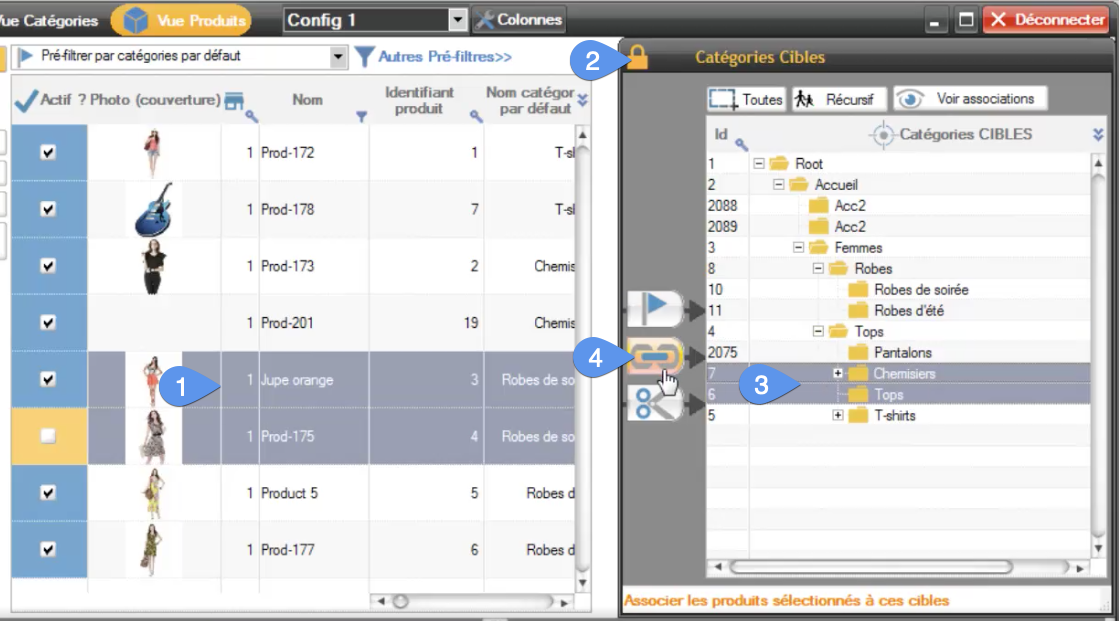
- Display and select lines of products to associate.
- Open the right control panel, also called "Target categories".
Then :
- Select in this panel the categories to link products to (with Ctrl+clic or Shift+clic).
- Click on the large "chain" button, to add the products. You are done.
Or (our recommended method)
- Click on the "Show associations" button. This is adding at least two columns into the table : one indicating the current associations and one per shop, showing what is the default category.
- Select in this panel the categories to link products to (with Ctrl+clic or Shift+clic).
Note : take the time to study this other trick, the recursive serach and selection, to search for and automatically select all categories matching any given criteria. - Check one of the check box of these lines, in the columns "Associated products". You are done.
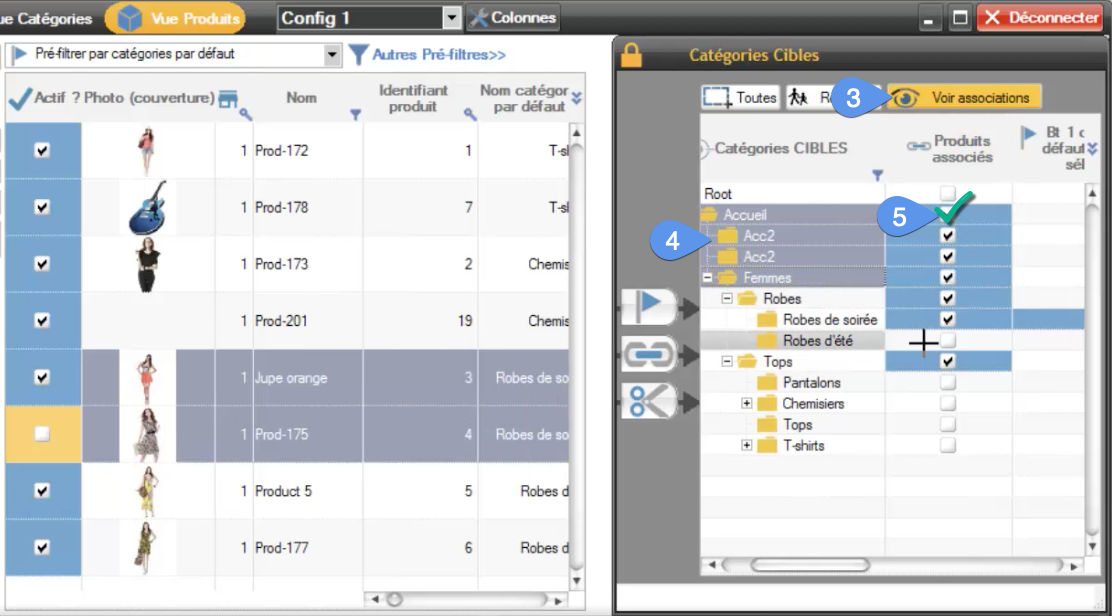
There is a color code to be familiar with :
- A blue check box means that all selected products are linked to the category.
- An orange check box (with a square check mark) means at least one product, but not all products is/are associated to the category.
This is very practical because it allows you to quickly and visually check whether a selection of products supposed to be associated with one or more categories are all so.
If this is not the case, select all the rows of categories to be associated, and click on one of the orange boxes of this selection, to change it to blue (as well as those of the other selected rows), and the problem is resolved.
Category's other articles Mass management of PrestaShop categories
-
How to change the display order of categories?
How to
This very simple trick allows you to reorder PrestaShop categories in PrestaCategories, per name, per identifier or per position value like in the front office
-
How to duplicate a category with all its products ?
How to
This very simple trick, using PrestaCategories or Merlin PrestaShop add-ons, will allow you to mass duplicate categories and copy also their associated products, without creating duplicates
-
Change the display order of PrestaShop products
How to
Learn how you to change the position of products in each of their associated categories using Prestashop admin and how to bulk do it quickly using the Merlin Backoffice or PrestaCategories addons
-
Put discounted products in a category
Trick
Move or combine sale products in a discounted product category