How to create attribute groups and attribute values in PrestaShop
As a reminder, before you can create product declinations, you need to create the attribute groups and attribute values used by them.
If all this remains confusing, check out this little glossary covering all these terms and a bit more.
In this article, we'll explain two ways to go about it, the first with PrestaShop and its limitations, the other with the magic and power of Merlin Backoffice™.
Add or modify an attribute group in PrestaShop 1.7
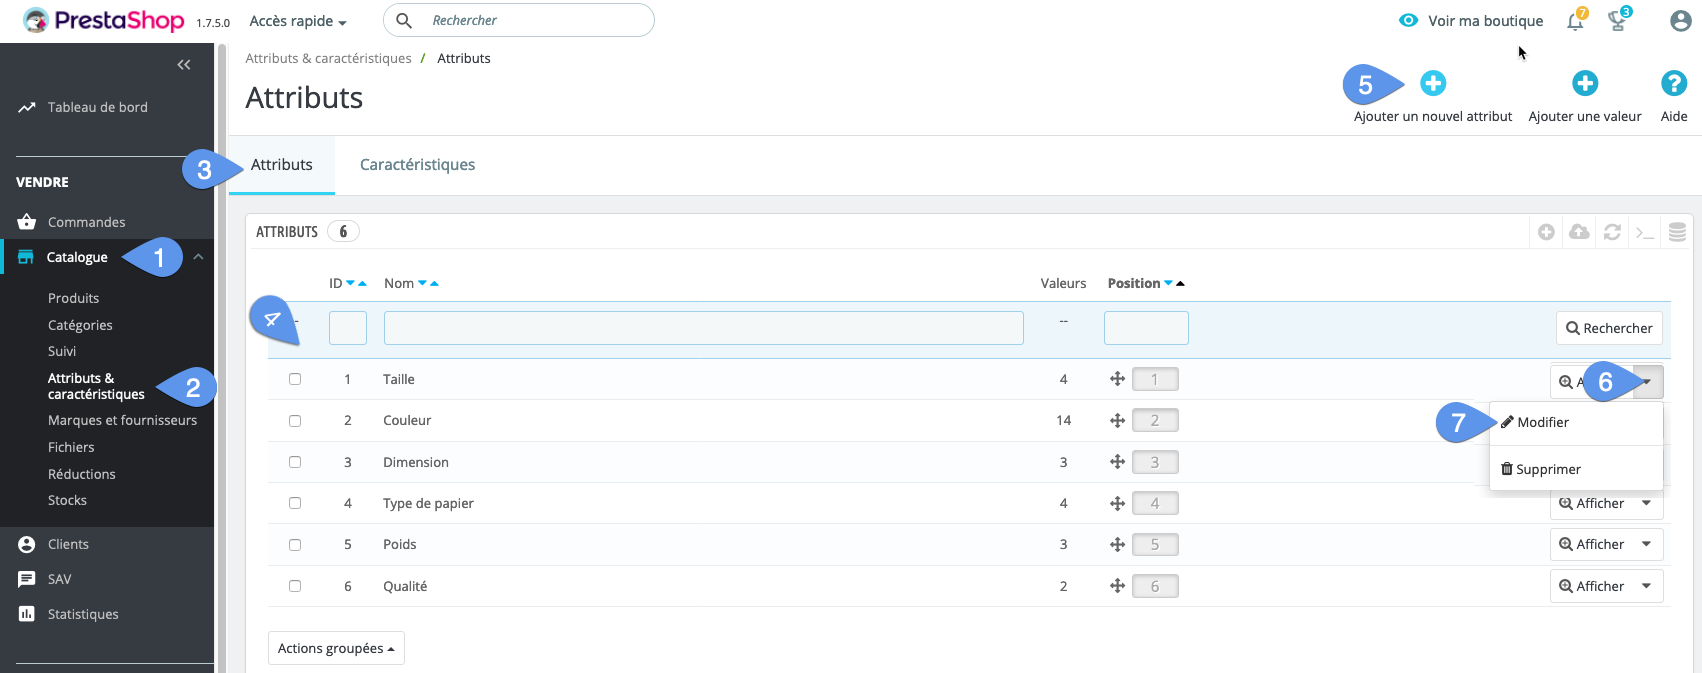
- Open the "Catalog" menu. <Select "Attributes".
- Go to the "Attributes" tab.
- The attribute groups already created are listed.
- Click on the first + button to create a new group.
- To modify or delete an attribute group, click on the drop-down arrow .
- Select "Modify" to change it:
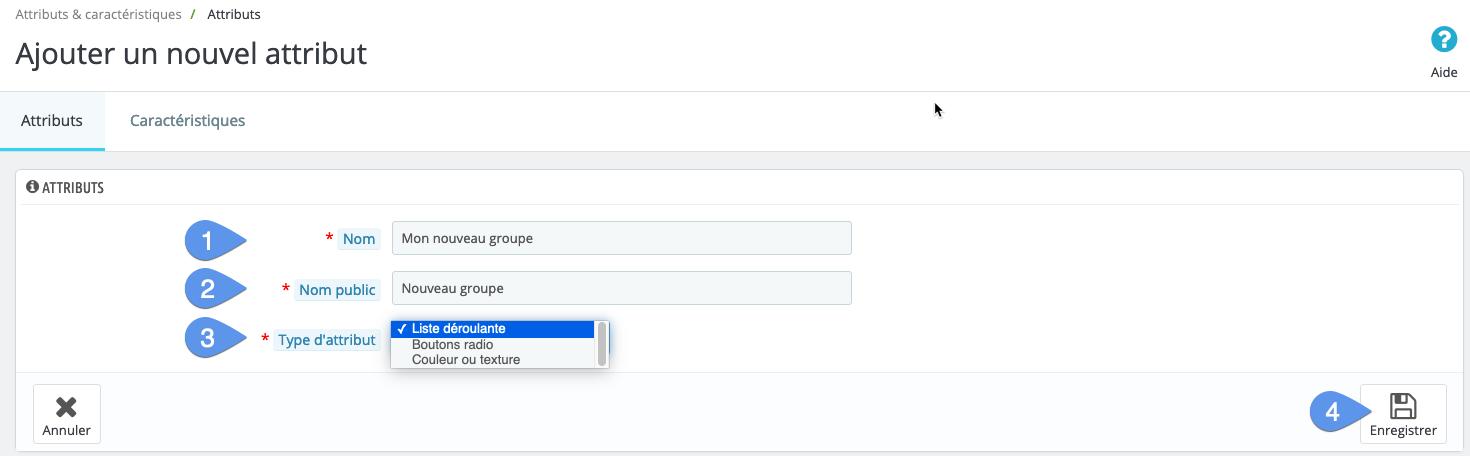
Whether you're creating a new group or modifying an existing one, you'll arrive at the same form, with three mandatory fields to fill in:
- The name of the attribute group, used only in administration.
- The public name, this is the one used on the site.
- The attribute type, determining the type of selector used in the store to choose an attribute, either a drop-down list, or checkboxes (radio buttons), or finally colored square patterns.
- Don't forget to register:
Add or modify an attribute group in PrestaShop 1.6
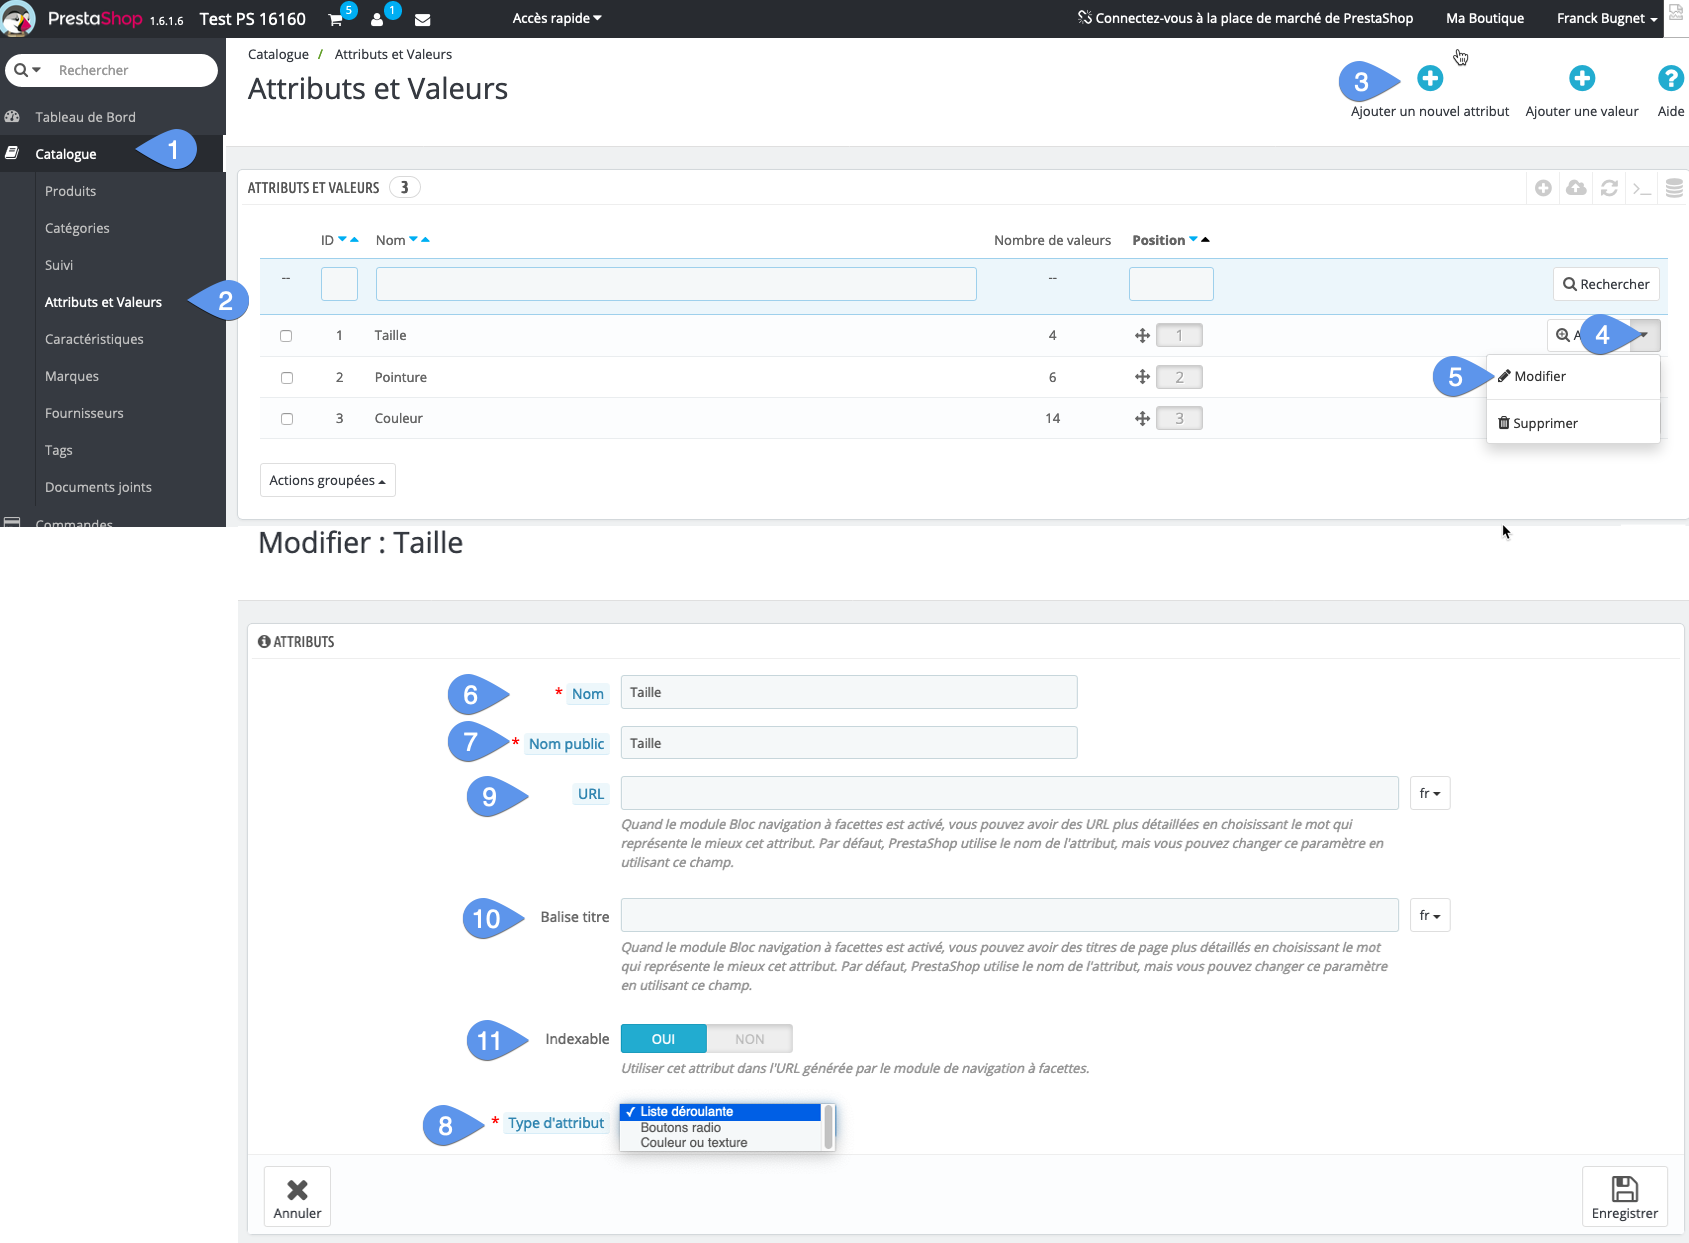
The approach is virtually similar. The only differences are:
- This is accessed via the "Attributes and values" menu.
- There are no tabs to choose from (different page from "Features").
- The form contains more fields (9 -10 - 11 on the capture), used only if the facet navigation module is activated:
Add or modify an attribute (or attribute value) in PrestaShop 1.7
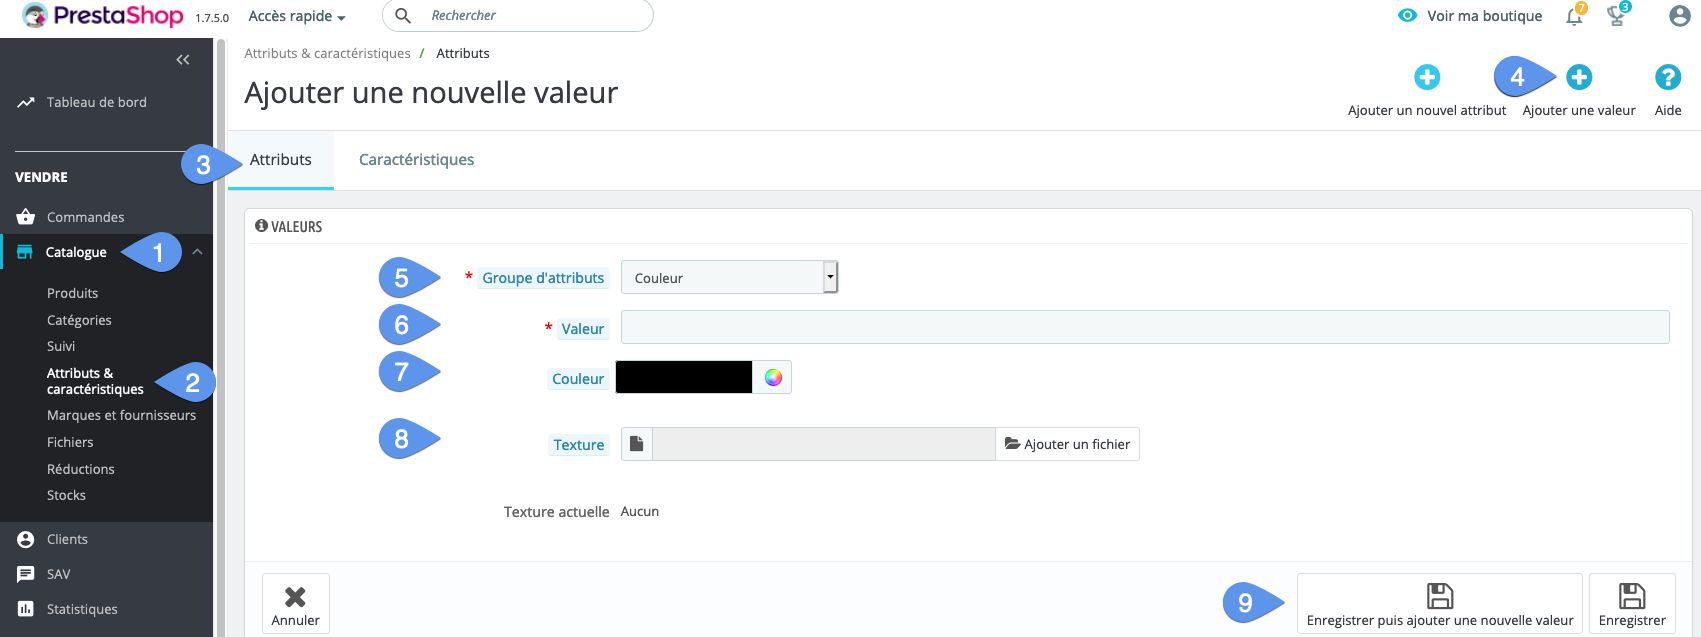
- In the same way, go to the "Catalalogue" menu.
- Then go to the "Attributes and features" page.
- Stay in the "Attributes" tab.
- Click on the second + button to add a new value (or attribute).
- Choose the "Attribute group" (note in passing PrestaShop's lack of consistency in the choice of terms).
- Enter the value of the attribute.
- Eventually the color of the attribute if the group is a color group.
- Eventually the texture file if the group is a group of textured colors.
- Save (with choice to remain or name on same page).
Managing attributes with the PrestaShop Merlin Backoffice module ™
The basic principle of this module, being to be able to manage the catalog faster, this obviously also includes managing attribute groups and attribute values. This is why a tab in the application is dedicated to them, allowing you to do many different things en masse, i.e. on a selection of several attribute groups and values.
Some examples of what can be achieved from this tab:
- Create new attribute groups and values, and of course delete them en masse.
- Change the display order of store attributes manually and automatically (e.g. alphanumerically).
- Choose colors from a color chart.
- Modify attribute types.
- Associate and de-associate store attributes.
- Modify names and values en masse with MagicEdit.
- Translate and mass-edit translations of names, public names and attribute values.
- Copy a selection of values from one group (or several groups), to one or several other groups.
- And of course, select values for use in the declination generator and launch it.
On this page, we'll just show you how to add some. Other features will be covered in other, more detailed tutorials.
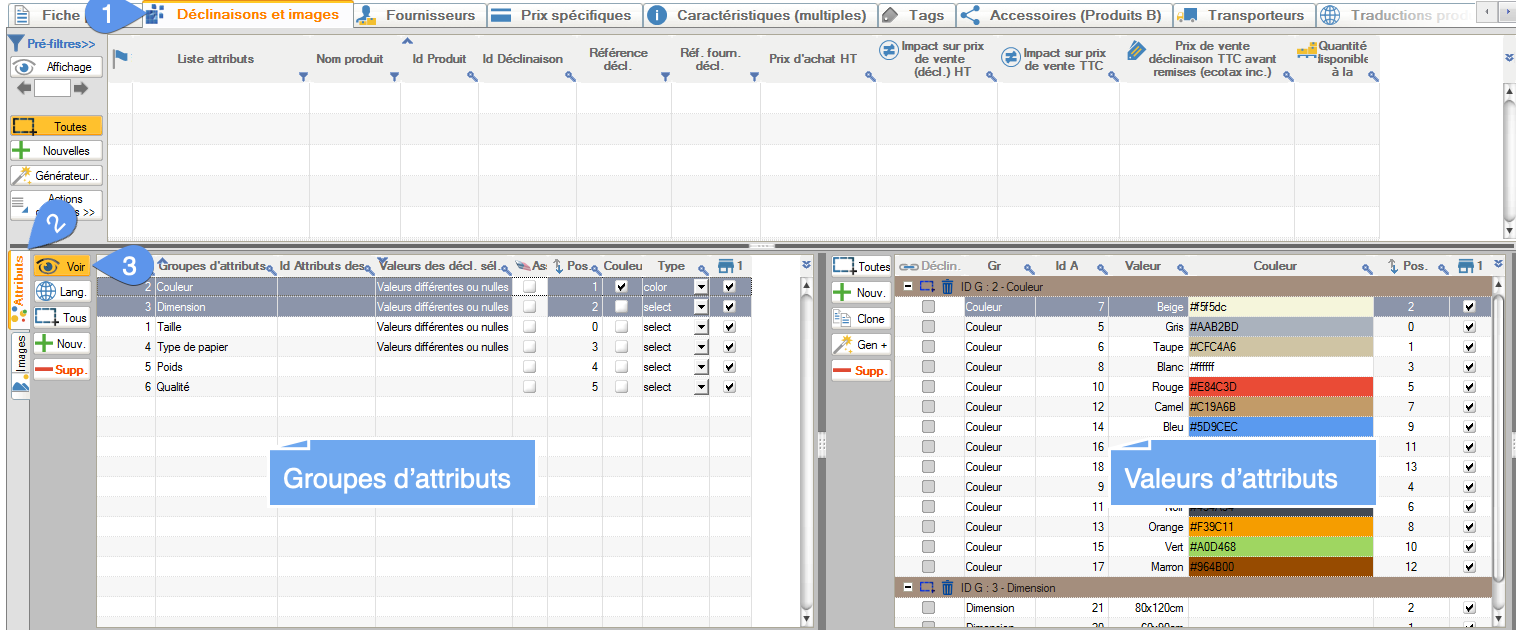
Let's start by looking at the existing attributes in PrestaShop
.
- Go to the "Declinations and images" tab.
- Then go to the "Attributes" sub-tab.
- And finally click on the "View" button.
- On the left you then have the list of attribute groups, and on the right the list of attribute values for various selected groups:
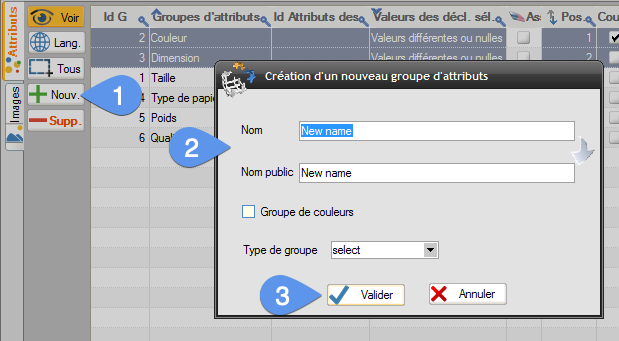
How to add a new attribute group
- Click on the "+New" button on the left-hand table
- Give your new group a name, a public name, define it or not as a color group and choose its type.
- Validate.
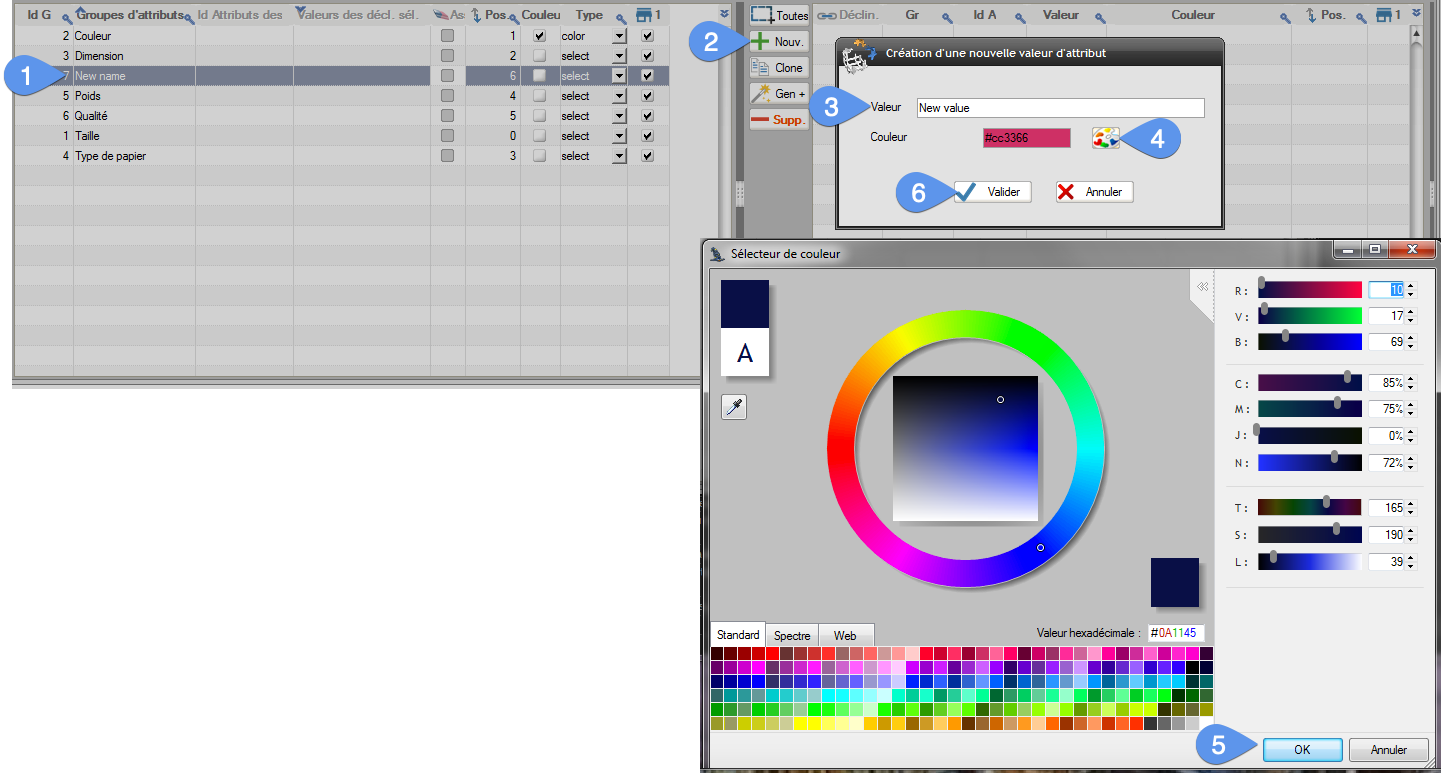
How to add a new attribute value (or a new attribute in PrestaShop terms)
- Select the attribute group to be enriched.
- Click on the "+New" button in the right-hand table.
- Give your new attribute a value.
- If it's a color, you can either enter it directly dasn the field, in the form #rrggbb or click on the button opening the color palettes.
- If you've opened the palette, select a color.
- Validate.
Category's other articles Managing PrestaShop variations and attributes
-
How to set the order of display variations in your product pages?
How to
With PrestaPricing (or now Merlin Backoffice) , the Swiss knife addon for PrestaShop, you can also easily change the display order of variations of attributes in product pages. This tutorial is showing this in images, here's how
-
How to export product variations?
How to
This tutorial explains the best way to export the product variations from PrestaShop, using PrestaPricing or Merlin Backoffice addons from Sitolog
-
How to show and modify the color squares (color selectors)
How to
See in images how you to choose or modify the colors of the small square selectors associated with each color attribute of PrestaShop product, using Merlin Backoffice addon
-
How to deactivate a declination in PrestaShop without deleting it
Trick
How to
Here's a quick and easy way to deactivate one or more declinations in PrestaShop, in one or more products at a time, without having to delete them or reset their stock, thanks to Merlin Backoffice
-
Merging attributes in Prestashop
How to
A quick and easy way to combine duplicate or similar attributes into a single attribute, without having to redo the declensions