EasyTabs mass tab management (PrestaShop module)
Easy Tabs is a module often used to set up additional tabs or sections on product pages in PrestaShop stores.
Once the module is in place, managing the content of these tabs can only be done on a product-by-product basis when using PrestaShop's classic back office or admin.
On the contrary, Merlin Backoffice ® Flex's custom field management functionality enables mass management of this type of data. Both for associating tabs in a single operation across a large number of products, and for administering the text or HTML content of tabs.
The Easy Tabs module dissected
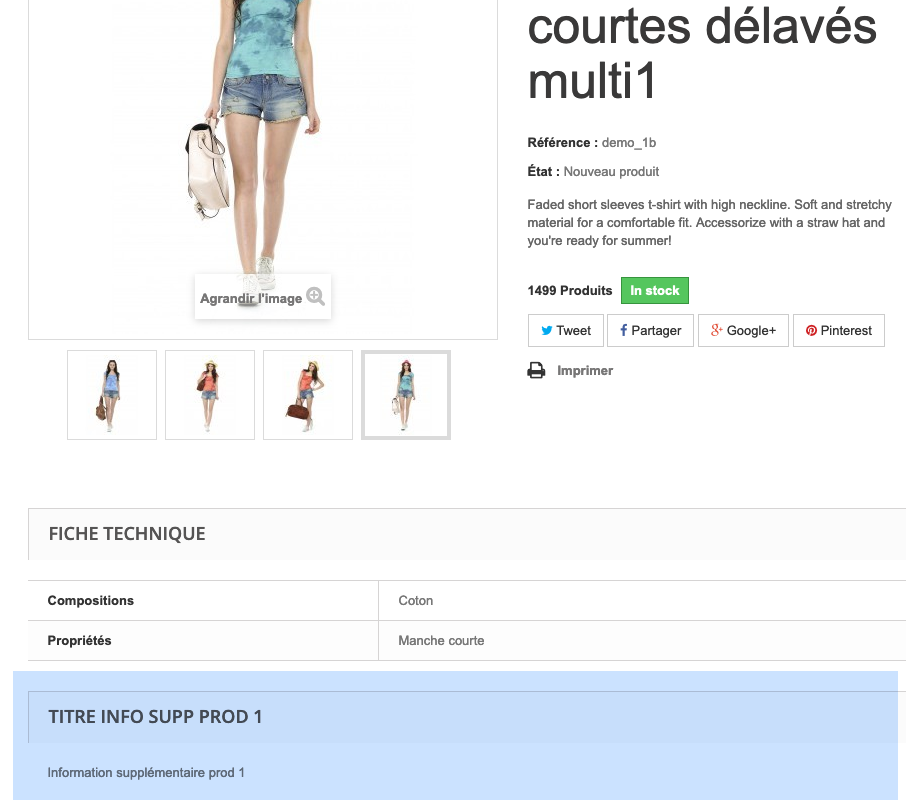
Here's how a custom tab added with the Easy Tabs module looks on a PrestaShop 1.6 site. In this version, the default theme won't display a tab, but a custom section. The operating principle, however, remains the same:
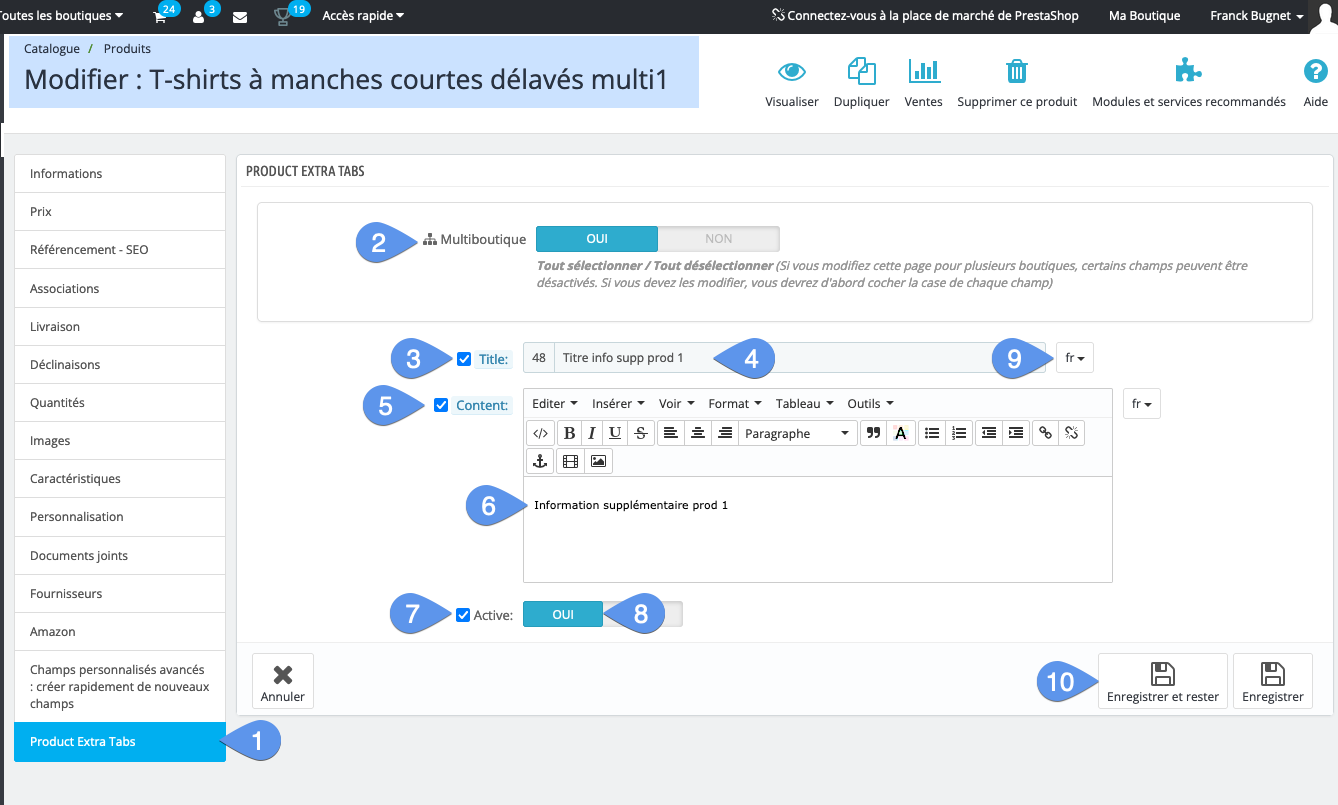
Here's an image of how the interface for managing the content of such a tab looks in the PrestaShop back office, and the steps to follow, for each product:
- Once the module has been activated, you'll see the new "Product Extra Tabs" menu. Click on it to open the page below.
- The module is multi-boutique compatible.
- Checkbox to enable multi-boutique management of the title.
- The title of the tab or section that will be displayed.
- Checkbox for multi-boutique content management.
- The tab's custom content, which you can define in this HTML editor.
- Checkbox to activate the tab in all stores.
- Switch to enable or disable the tab.
- Title and content support multi-languages.
- To validate, save and exit.
This data is stored in the base in two tables that the module has added.
The st_easy_tabs table, which stores tabs and their associations with products or categories, and activation in stores.
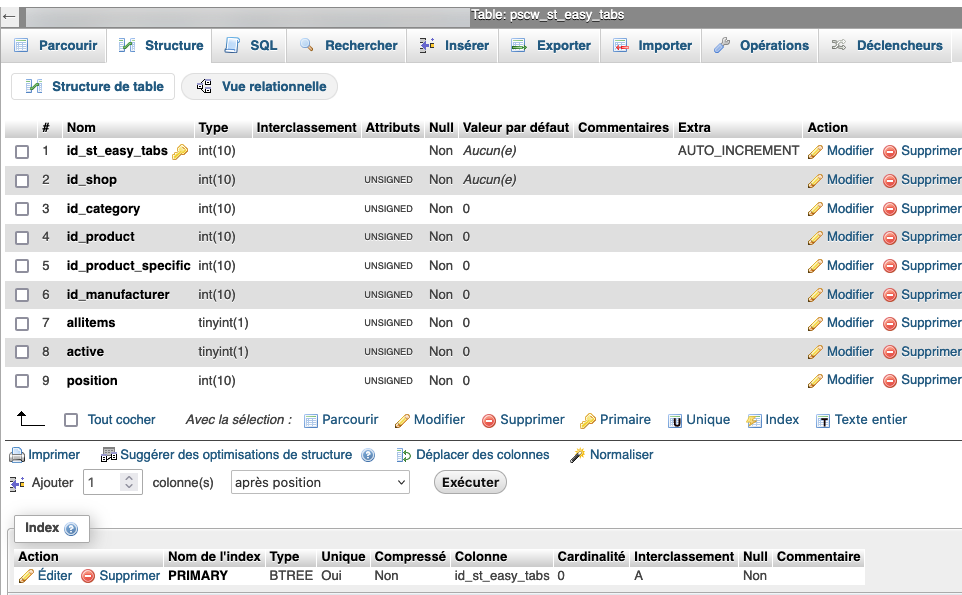
Analyzing the structure, we see that the id_st_easy_tabs identifier is unique and auto-incrementing. This tells us that a tab cannot be associated with several products. But a product can have several tabs.
We're on a simple 1-to-many type of relationship.
We'll see later, in another tutorial on personalized fields, the management of another module "Advanced Personnalized Fields", which in turn allows you to define content that can be shared between several products.
Merlin Backoffice ® Flex in fact allows you to manage various types of 1-to-1, 1-to-many and many-to-many relationships, without requiring any special skills.
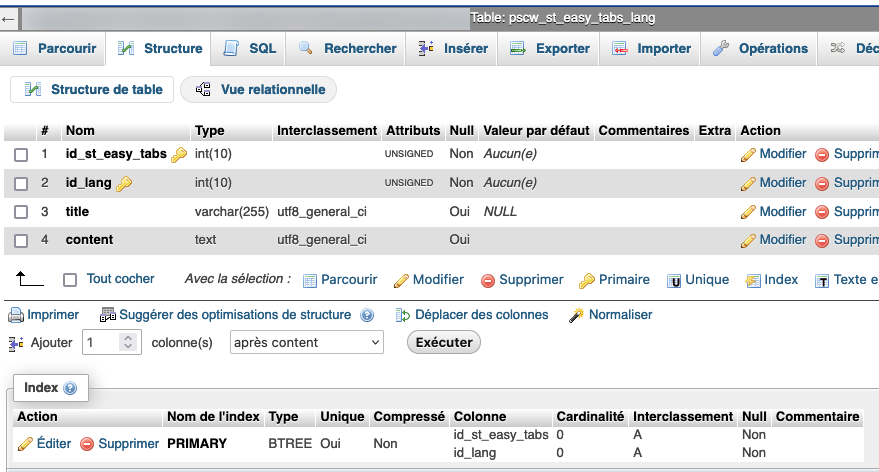
The second table is st_easy_tabs_lang and contains multi-language information such as tab titles and contents:
Configuring custom columns in Merlin Backoffice ® Flex
As we've seen in previous tutorials, the first step is to add and configure as many columns in the column configurator as you need to read the data to be modified from these tables, or to link them. Here we go with the step-by-step images....
- Once in the configurator, create a new configuration (named Easy Tabs here) and right-click in one of the two tables in the "Products" tab.
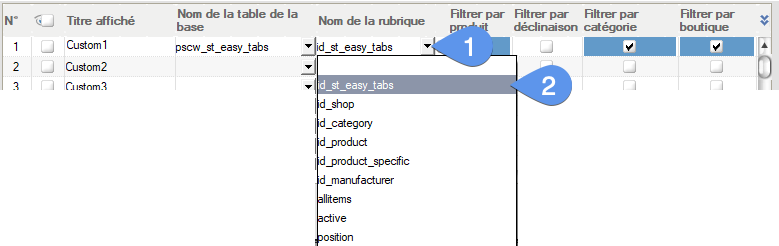
- In the custom column configuration table, let's select for the 1st of them the st_easy_tabs table from the drop-down list.

- Unscroll the list in the "Item name" column.
- Select the id_st_easy_tabs identifier. The aim of this tutorial is precisely to show you how Merlin Backoffice ® Flex will automatically administer this type of auto-incrementing rubric.
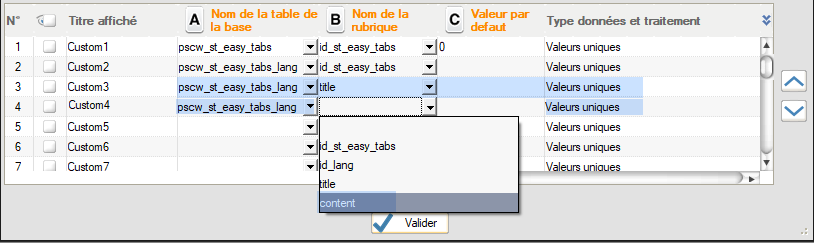
- For the second custom column, so the second custom column row in the table below, we choose the second table in the module, st_easy_tabs_lang , from the list.
- The program immediately alerts you to the fact that this table contains none of the automatic filter keys id_product, id_category etc... and that you'll therefore have to help it a little to understand how to read this table, thanks to the addition of a join:

- Let's unroll the list of fields available in this table again.
- For this second non-standard column, we're going to ask again for the id_st_easy_tabs identifier. This will enable us to establish the automatic link between the two tables.

- In this second custom line, let's now unroll the drop-down list for the "Auto join on..." column.
- This is where the magic happens, let's select "1 (Row no. of this table)", this simply tells the software to synchronize the reading and recording of data from these two tables on the id_st_easy_tabs identifier. The second line is now linked to the first by common id_st_easy_tabs values.

Let's continue adding custom columns, this time to read the title and content of tabs (we could also add a custom column to manage the mass activation of these, anything is possible).
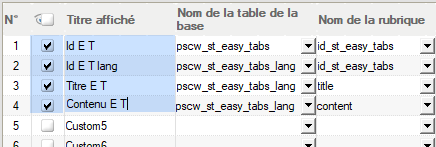
And we finish by activating and giving explicit titles to custom columns:
It's all there. And yet, if we stop here and try this configuration, you'll notice two things:
- The 4 custom columns are well found and displayed in the product table.
- But they're empty! As we saw at the beginning, the tables contain at least one tab associated with the first product.
Why? For the more technical among you, I suggest you stop reading this tutorial and try to find out for yourself the cause of this unexpected result. Just a few hints: analyze the data in the st_easy_tabs table, it's all about ids and zeros....
Found, not found?
The answer: if you look at this table, you'll see that the id_product column contains zeros! but on the other hand, there's an id_product_specific column in this table, and it's therefore this column that contains the id_product value for the associated product. You can't make this up, the minds of developers are decidedly tormented :-)

Or, Merlin Backoffice ® Flex, analyzing the table structure, couldn't guess this state of affairs and thought that the id_product column was the column for filtering the table according to products. He did the same for the id_category column.
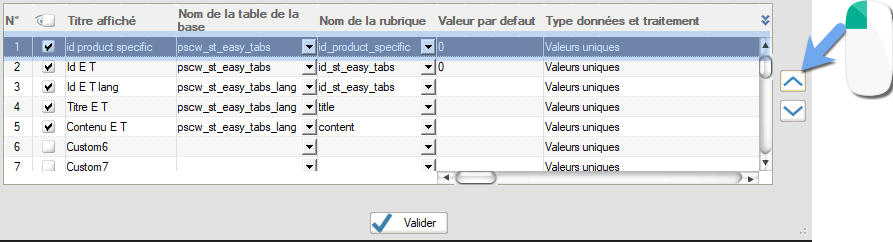
We're going to help him a little by adding a fifth custom column, known as the link or join column, containing the values of id_product_specific:

And above all by adding an automatic join between this custom column and the standard column containing product identifiers, like this:

Probably the trickiest part of this tutorial to understand: you also need to remember to remove the 2 automatic filters that the software has set up because of the presence of the id_product and id_category columns in the st_easy_tabs table. You'll do this by unchecking the two blue boxes below, "Filter by product" and "Filter by category":

You'll notice in passing that this also removes the automatic filters present in line 5. This makes sense, as lines 1 and 5 concern the same st_easy_tabs table. It's important to understand that the filters act on the line's table and not on the line's heading.
We also need to activate this 5th row and give it a more explicit column title;

We haven't talked about it yet, but the order of the rows in this configuration table is also important, as it's also this order that will be respected when reading the tables and fields in the database. Now, it's important to start by reading this id_product_specific value before the others, to correctly filter the other data.
To do this, we'll simply move the 5th row up to the first position. this is done simply by clicking on the "up" arrow present on the right of the table:
By doing this, we've shifted the other rows down and broken the link we'd established between rows 2 and 1. We'll have to start again to establish it between 3 and 2, like this:

Here we are at last, after validating and re-reading the data, the product table now looks like this, with the requested data displayed. We'll now be able to modify them if we wish:

Mass editing of custom tabs
Category's other articles Mass management of custom fields
-
Mass management of a second description field in PrestaShop
How to
Step-by-step instructions for mass-managing the content of a second descriptive field (text or HTML) added to PrestaShop product sheets
-
Custom supplier fields
How to
A revolutionary method for managing additional information in your PrestaShop supplier files