Mass management of personal data added to suppliers
The aim of this second tutorial on bulk management of custom fields is to teach you three additional things compared to the first tutorial (which is essential to follow first):
- How to use this technique to mass-edit fields native to PrestaShop but not natively managed by Merlin Backoffice ® Flex. We'll take the "Description" field for suppliers as an example.
- How to establish an automatic join between two personal columns.
- How to establish an automatic join between a custom column and a standard column.
Start by studying the table containing the custom fields to be administered
In fact, in the majority of cases where mass custom field management is used, the first step is to open the table or tables in the database containing the fields in question, in order to learn about their structure.
The context: in the current version of Merlin Backoffice Flex, we can do fine-grained, mass management of cross-associations between products and suppliers, but we can't yet change their names or descriptions.
The aim of this tutorial is to teach you how to administer any of the supplier properties en masse with Merlin Backoffice ® Flex, such as their name or description as well as a second custom description that we've added to the table, as we did previously for products.
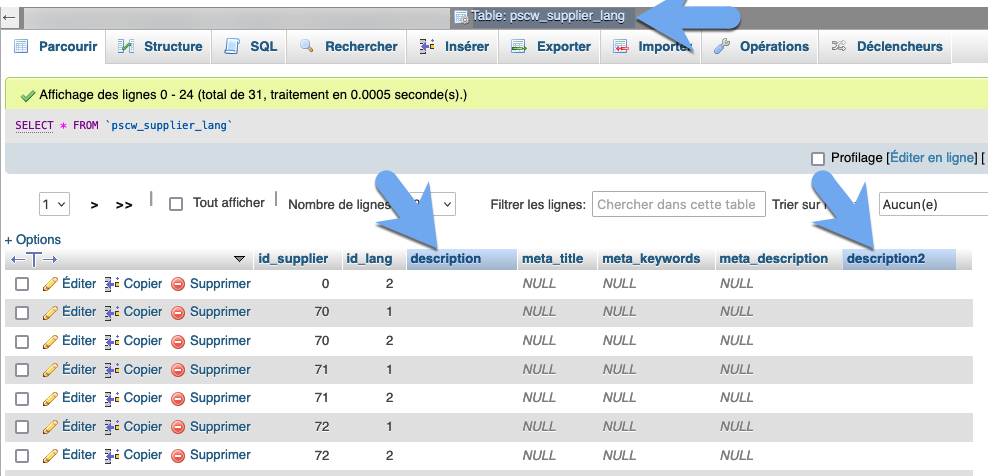
The table we're going to process is therefore the supplier_lang table, which we've opened below in PHPMyAdmin.
Display headings in Merlin Backoffice ® Flex custom columns
If you're completely unfamiliar with the technique, please see or review the first tutorial in this category.
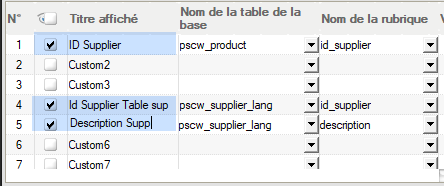
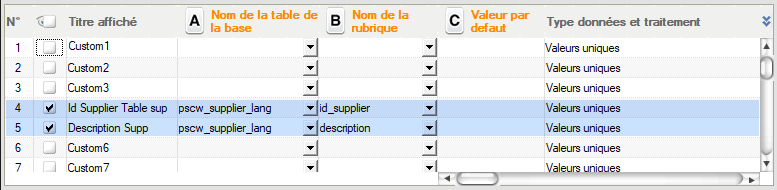
In other words, as you were shown, go to the column configurator, create a new configuration and drag and drop from left to right three custom columns. Below we've chosen N° 1, 4 and 5.
- For N°1, map it to the product table and the id_supplier field. This will allow us to choose the supplier to read and modify, in this case the product's default supplier, identified in this table by its Id.
- For N°4, we'll also read id_supplier, but this time in the table containing the fields to be modified (e.g.: supplier description), i.e. the supplier_lang table studied in chapter 1).
- And finally, in N°5, in the same table, I choose the 1st field to modify, the "Description". But I could just as easily have chosen "Description 2", or even included a personal line for each one.
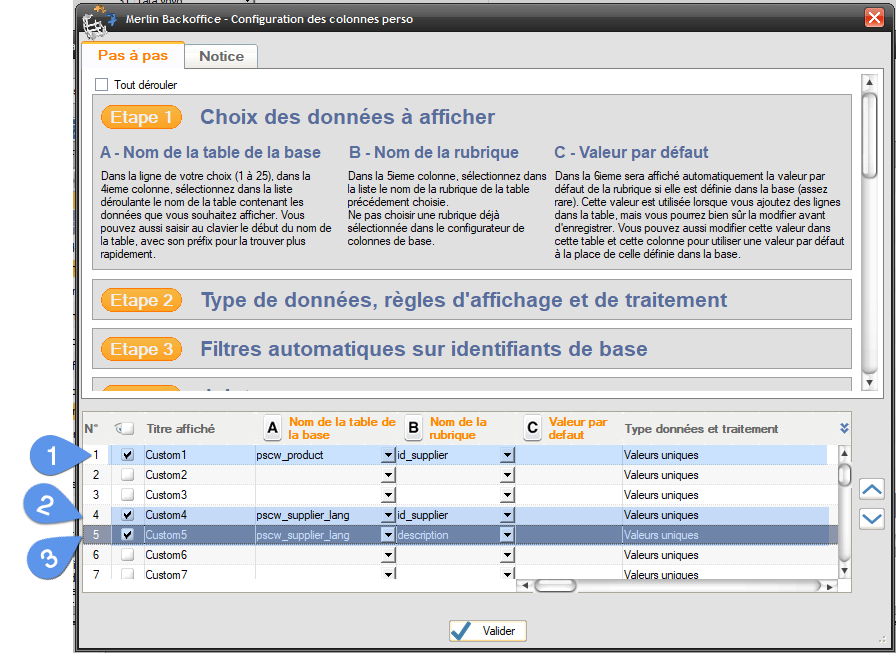
For the three rows, the default data type "Unique values" is perfectly suitable, as a product has only one default supplier).
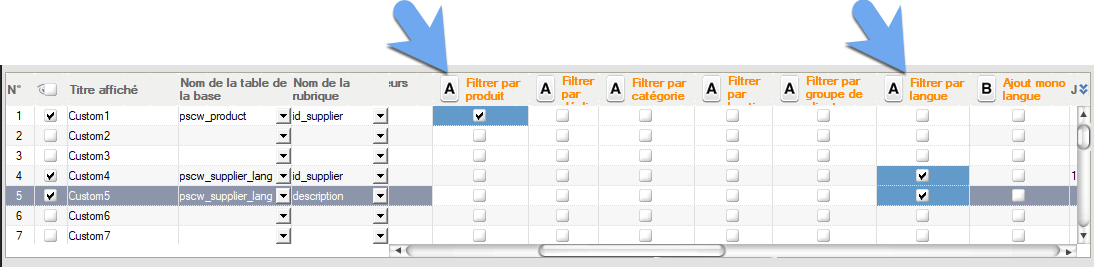
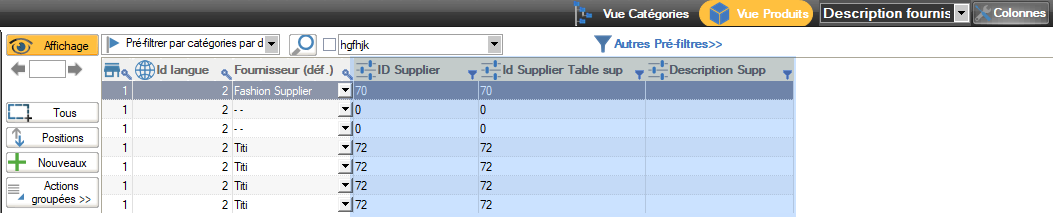
Let's then take a quick look at the automatic filters, which Merlin Backoffice Flex filled in automatically by analyzing the structure of the selected tables. We can see that the product table is of course filtered by product and that the supplier_lang table is filtered by language (but not by store, indicating that PS doesn't allow this information to be customized independently for each store).
There's nothing to change regarding these settings.
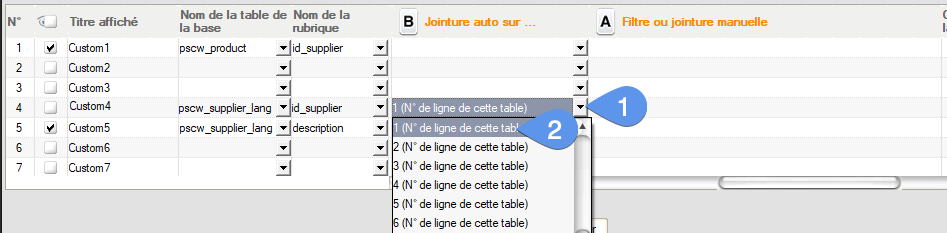
Now we need to tell the tool how to link the two tables product and supplier_lang together.
As you may have guessed, what we want is for both supplier_id to always have the same value. Or that when Merlin reads each product, it searches and reads in the supplier_lang table the row corresponding to the same id_supplier value as the one found in the product table.
For a developer familiar with the mySQL language, this means writing a SELECT query with a LEFT JOIN between the two tables, with an ON condition on id_supplier.
But never fear, you don't even need to understand this gibberish, Merlin Backoffice ® Flex will do all this for you.
All you have to do is:
Method 1: link two rows of custom columns
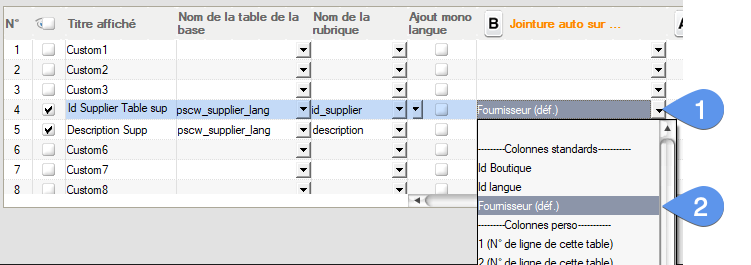
- In row N°4, pull down the list present in the column "Auto join on..."
- Select the value "1 (row N° of this table), to tell Merlin to make row N°4 dependent on row N°1.
Then we activate and give a more meaningful "Displayed title" to our three future columns:
Once the configuration has been saved, the product table is refreshed. You can immediately see the default supplier Ids (e.g. 70 for the first product). We also automatically find the same values in the "Id supplier Table supplier" column, thanks to the automatic join between the two personal columns N°1 and N°4:
You can now freely enter the Supp Description column individually or en masse (wrong heading, in this exercise it's the default description).
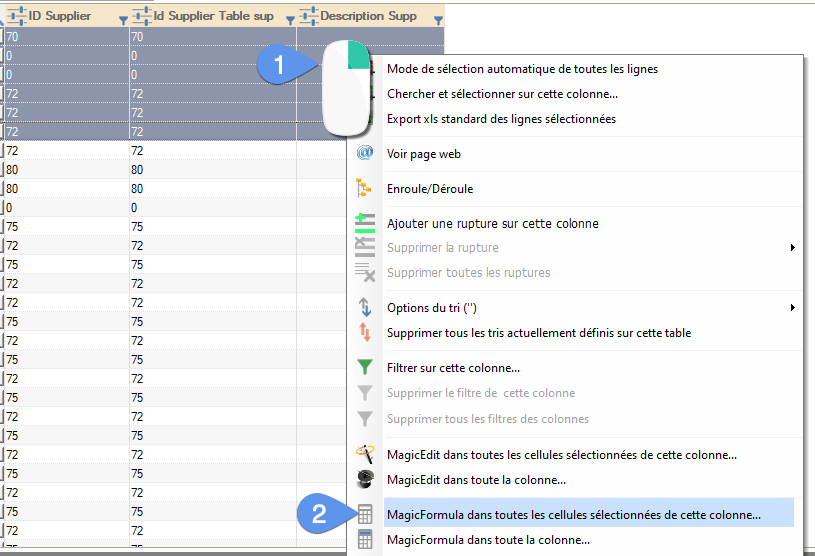
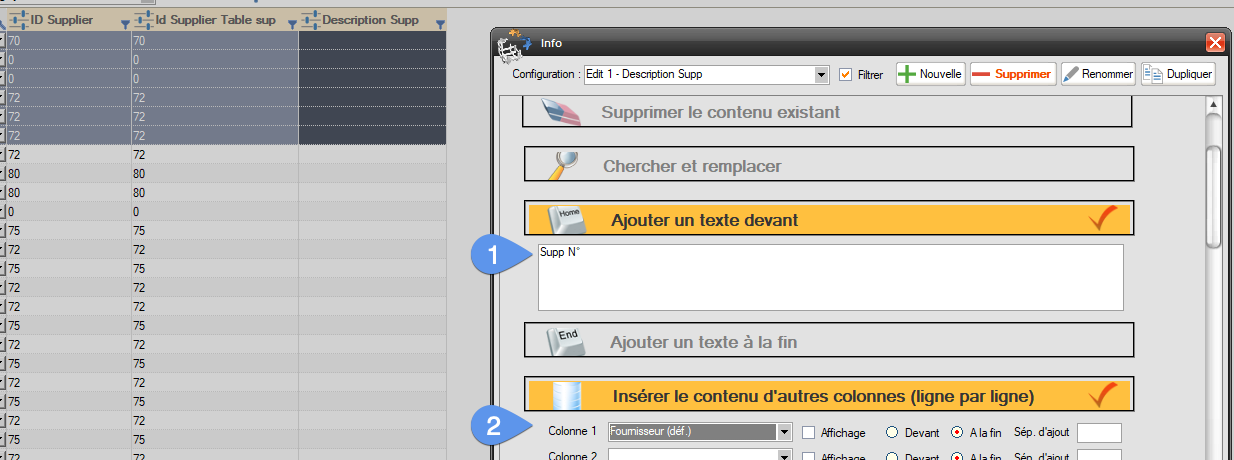
As an example, here's the method with MagicEdit, to fill the column with the parameterized text "Supp N° x" with x being the supplier's Id:
- Right-click in column to open context menu.
- Launch MagicEdit on selected lines.
- Select "Add text in front" filled with "Supp N°".
- Activate the column aggregation function and select the "Supplier (Def)" column.
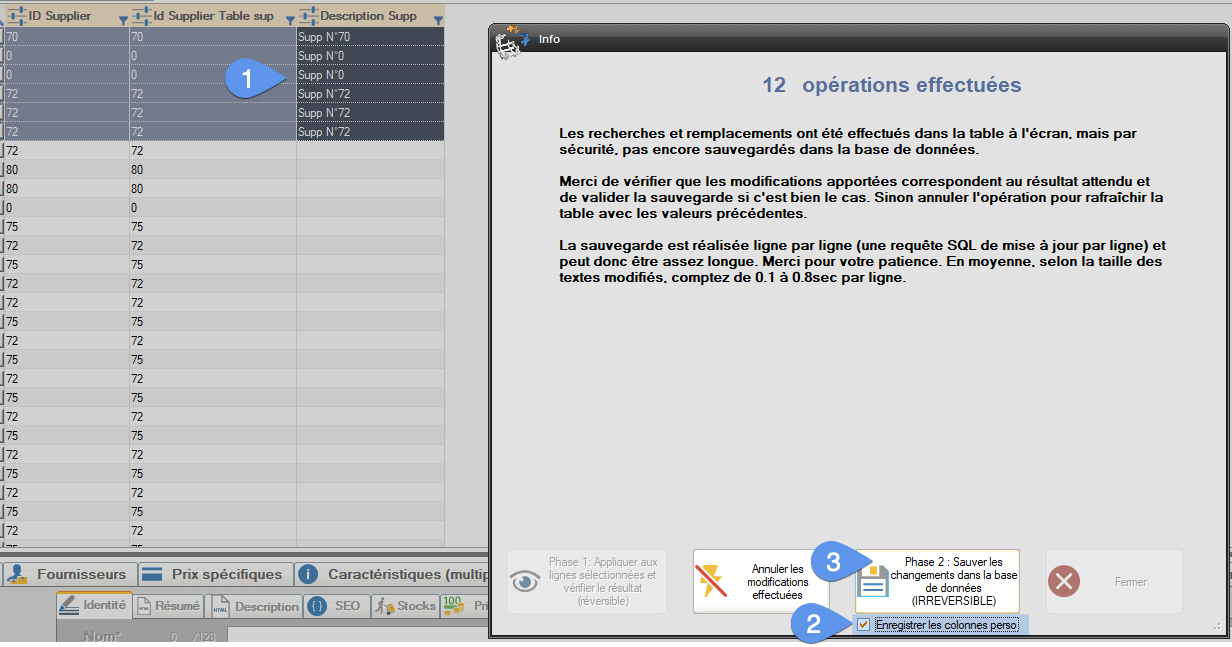
- The "Phase 1..." button is clicked. (not visible on the screenshot), to preview the result directly in the product table.
- We check "Save custom columns" (we can also save later).
- Click on the "Phase 2..." button to validate and save.
Method 2: linking a custom column to a "standard" column
With this second method, it's even simpler, we're going to link the column displaying the supplier Id from the supplier_lang table, directly to the standard column displaying the supplier name.
As a result, we no longer need the N°1 perso column row, which is only used in the first method to establish the link. We keep only the two personal columns of the supplier_lang table:
And we replace the previous auto join on line N°4, with a join on the standard column "Supplier (def.)." :
After saving this new configuration and re-reading the data, we see that the link is indeed functional:
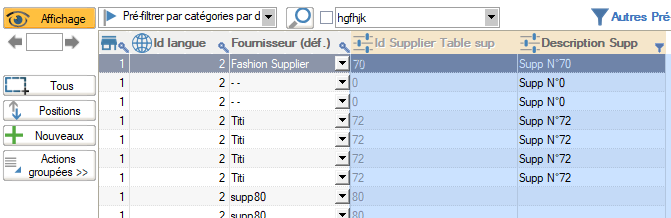
You can try changing the default supplier selection on a set of products yourself, and you'll see the content of the grayed column updated automatically thanks to the direct join.
Category's other articles Mass management of custom fields
-
Mass management of a second description field in PrestaShop
How to
Step-by-step instructions for mass-managing the content of a second descriptive field (text or HTML) added to PrestaShop product sheets
-
Mass management of new Easy Tabs
How to
Methodology for mass-managing Easy Tabs content in PrestaShop product pages