How to program and generate recurring purchases
What could be more tedious and time-consuming than having to enter the same expenses in your accounting every month or quarter, such as hosting fees, subscriptions to various tools like Semrush or MailChimp, bank charges etc.
For as long as I can remember, AutoPresta, PrestaShop's complete yet simple accounting solution for micro-businesses, lets you store this type of purchase as templates and reuse them to insert new pre-filled expense lines.
Version 3.0 goes much further in automation, offering a true recurring purchase planner.
Creating a new recurring purchase from an existing one
Let's take an example to illustrate the process. In your current accounting, in AutoPresta's expense register, let's imagine that you've already entered this purchase once corresponds to the monthly billing of your hosting company (line selected and click on the edit button to see the details):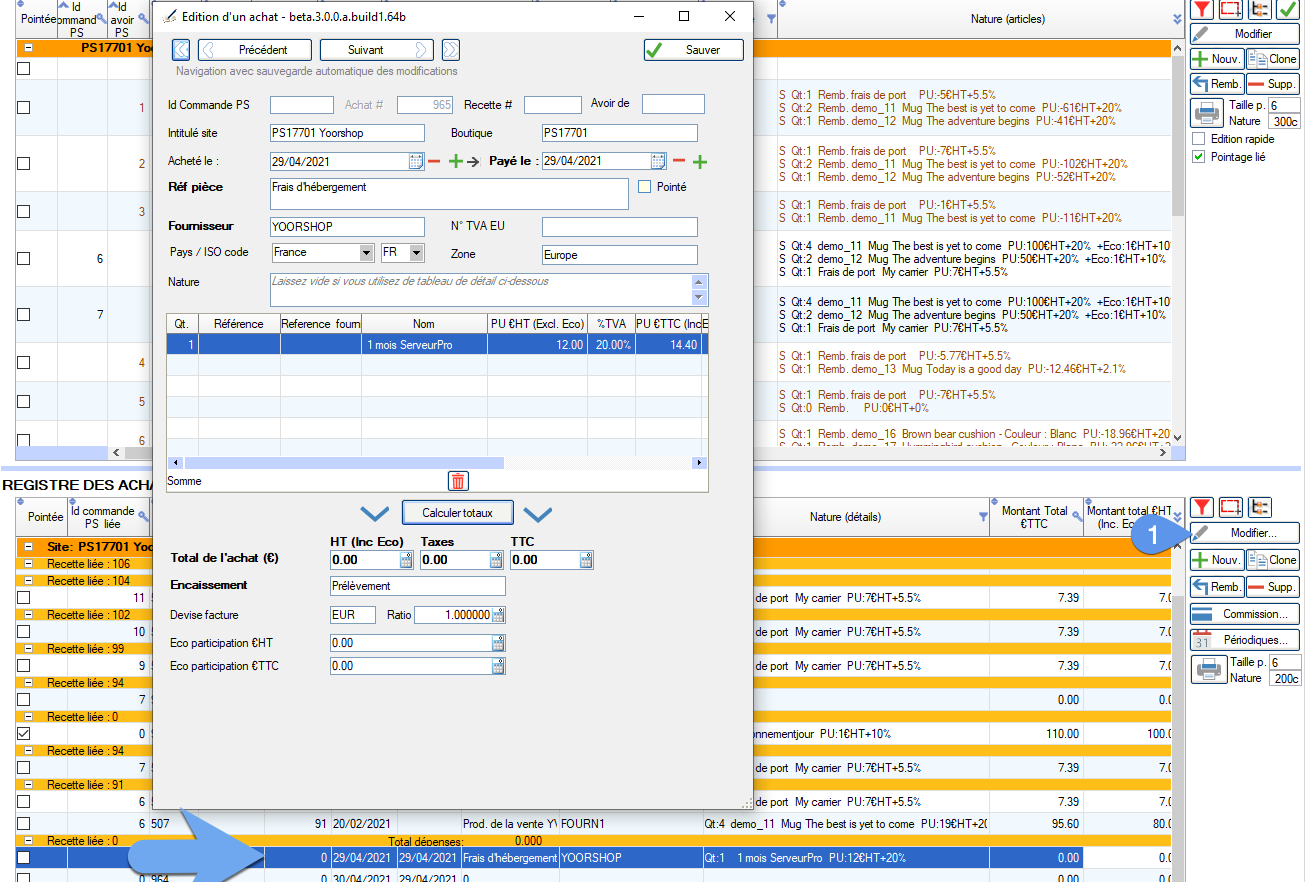
You know that this expense will recur every month and would like to avoid having to re-enter everything by hand. So we'll use this line as a template to create a recurring purchase.
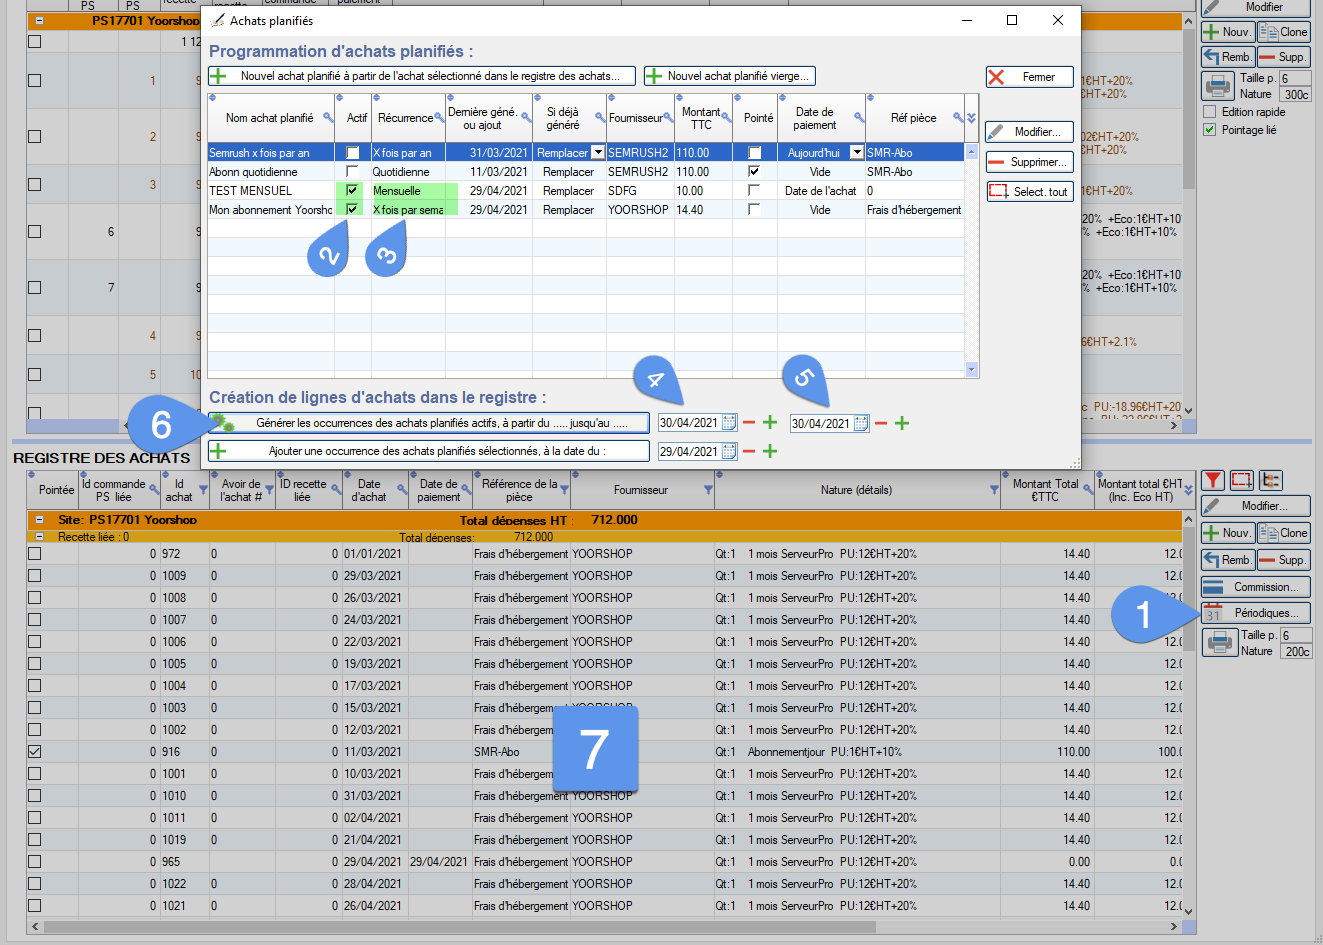
- Select the line.
- Click on the "Periodicals" button.
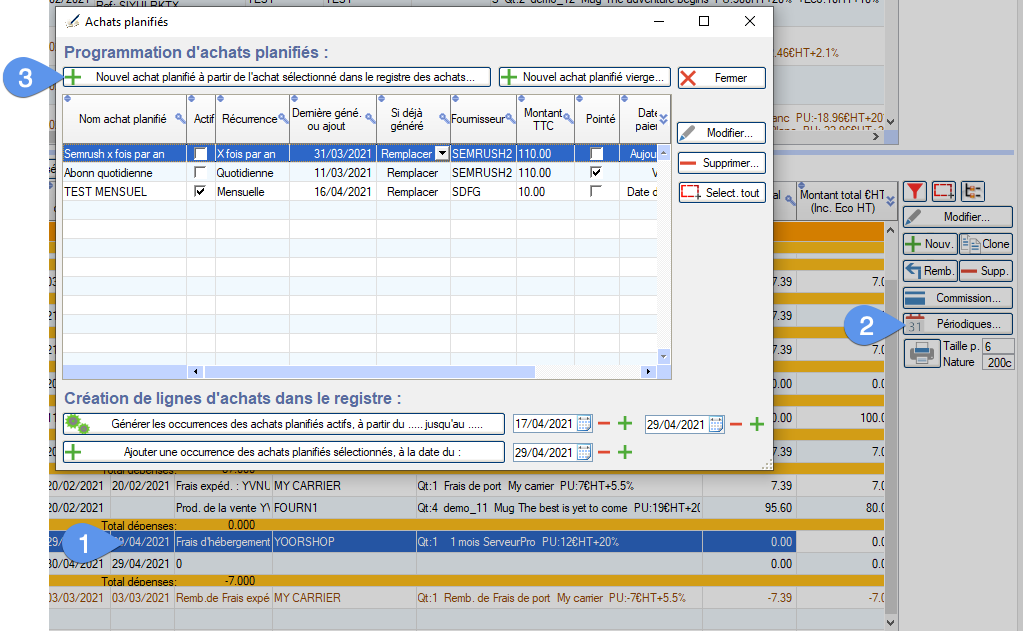
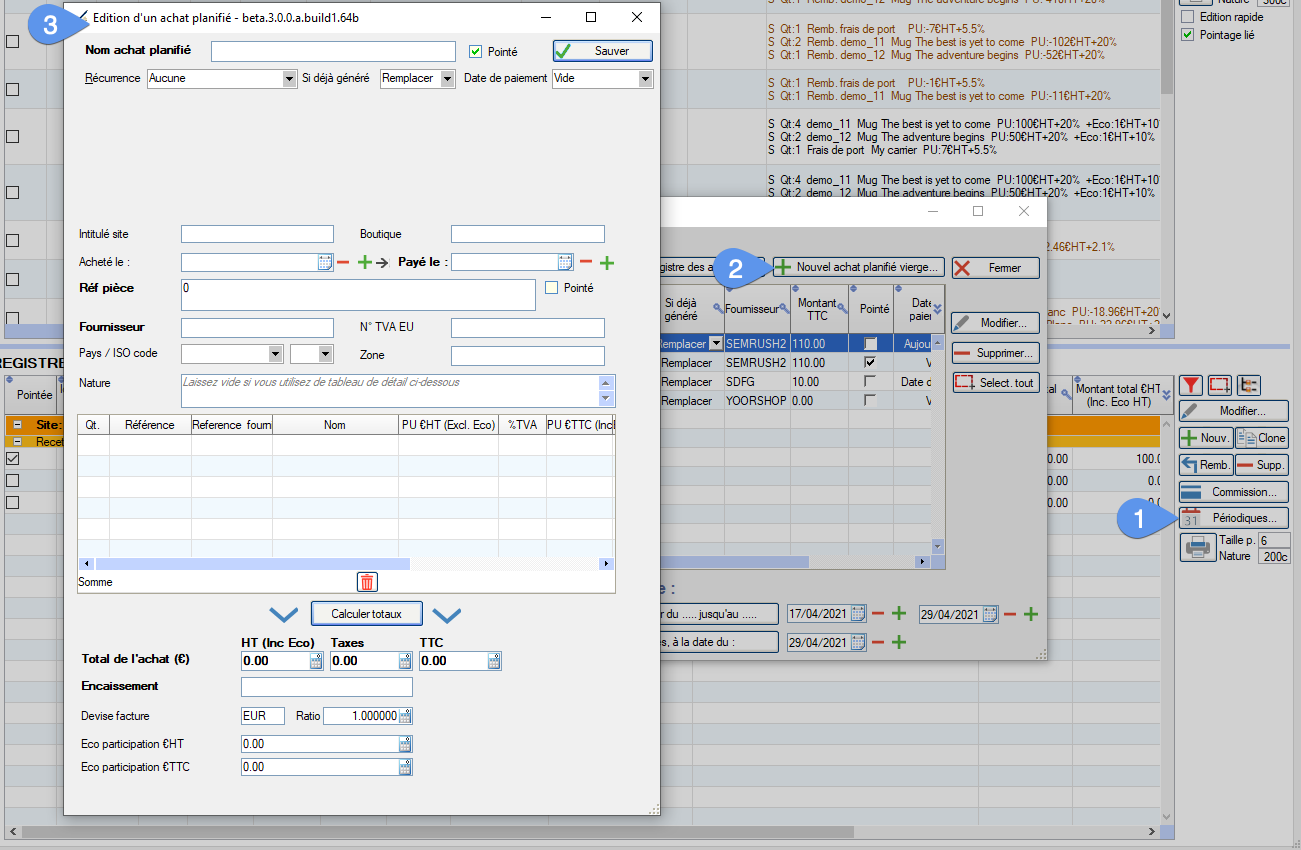
- The Planned or Periodical Purchases window opens. The table lists planned purchases already scheduled. Click on the "New planned purchase from selected purchase..." button.
This opens the planned purchase editing window, pre-filled with data from the pre-selected purchase. All that remains is to give it a name and define the periodicity: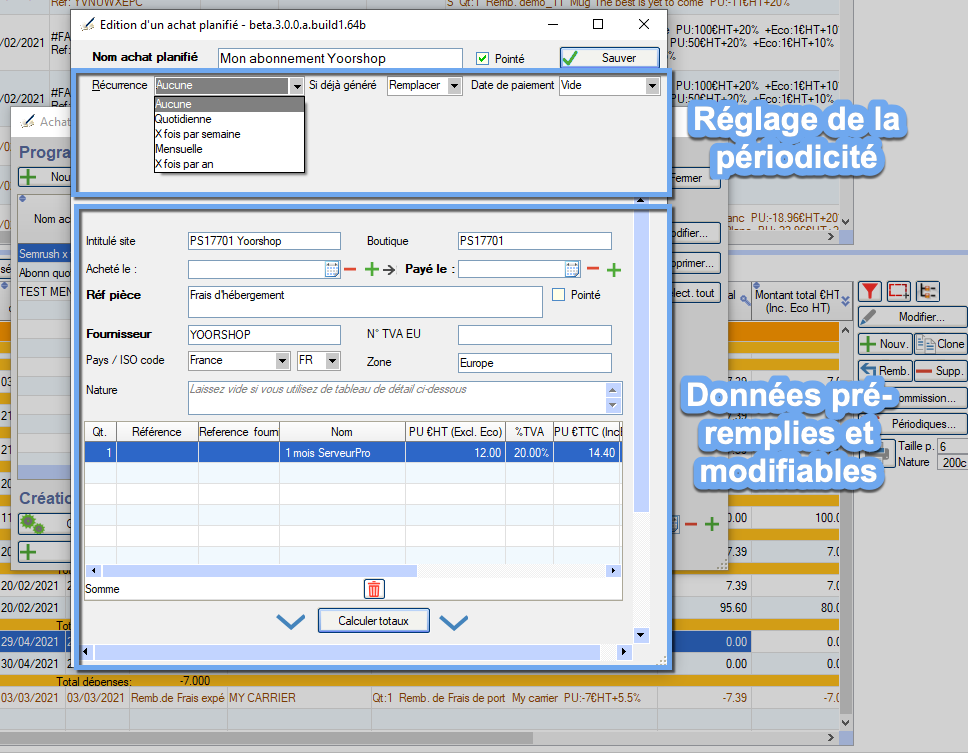
Periodicity selection and settings
None
This allows you to create a purchase template, which will not generate periodic purchase lines automatically, but only manually, on the date of your choice.
Daily
For purchases, expenses or billings that take place every day of the year, such as parking tickets or freeway tolls to get to work, for those who work even on weekends.
X times a week
Give you more precision by allowing you to choose the days of the week concerned.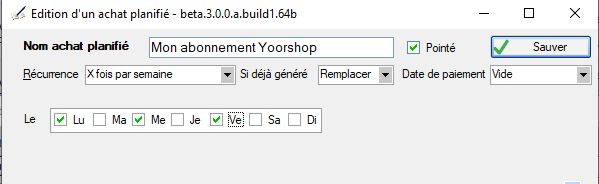
Monthly
For purchases with a monthly frequency or more. You can indicate the number of the day of the month or the calendar day as here the second Tuesday of each month: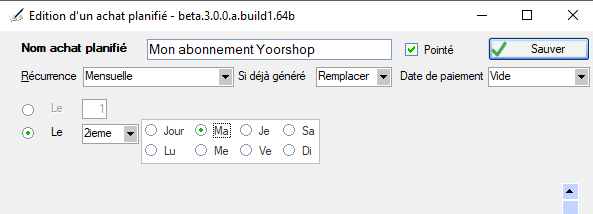
X times per year
For billings or purchases occurring several times each year. Typically this may be the case for quarterly payment of certain charges.
You have the option of indicating the months of the year concerned, and as for monthly payments, to indicate the date or day: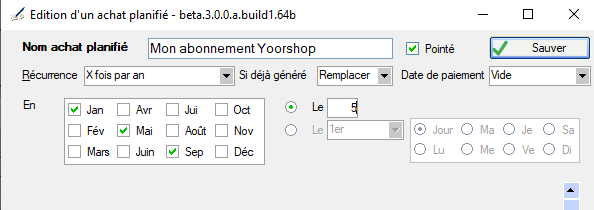
Add or update method
When generating purchase lines, the case may arise that the same occurrence of the same purchase has already been generated, in the register.
This option lets you define what autoPresta should do in this case Either replace the line, or keep the existing line intact (so do nothing), or add a new line (it's up to you to delete any duplicates afterwards). 
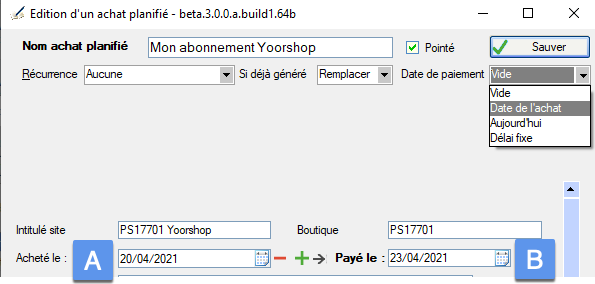
Automatic payment date
When automatically adding new occurrences to the register, of the planned purchase, you have various choices regarding the automatic filling in of the purchase payment date.
- Or leave it empty
- Or fill the payment date with the purchase date .
- Or fill it with the date of the day the purchase is added to the register
- Or calculate this date with an interval of days after the purchase date. The interval is the difference between the two dates A and B.
Creating a recurring expense from scratch
You don't actually have to already have an occurrence of a purchase in the register to create a planned purchase. It can be done from a blank form.
- Without selecting an expense line (not annoying though if there's one selected), click on "Periodicals"
- In the planned purchases management window, click on "New blank planned purchase"
- The form opens, give your plan a name, a recurrence, enter descriptions and amounts and save. The window closes and your planned purchase is added to the list.
How to generate automatic occurrences of planned purchases
In fact, once a planned purchase has been created, it is present in the planned purchases table, but nothing has been added to the expenditure register or purchase register. To fill the register, you need to request the generation of occurrences.
An occurrence is a new purchase line, at a given date, created from the templates that are the planned purchases.
You can either generate series of occurrences thanks to their periodicity, or manually add them one by one, at a precise date.
To generate hit series:
- Open the window listing planned purchases.
- Only planned purchases defined as active will be used by the generation tool. Other lines will be ignored.
- Similarly, only those with a recurrence will give rise to a series. Other lines will be ignored.
- Define the start date of the series to be produced (sets itself on the date of the previous generation).
- And the end date (sets itself to the current date).
- Click on the hit series generation button.
- All requested hits are automatically generated and inserted (or replaced, ignored... depending on the setting in the "If already generated" column) in the purchase register.
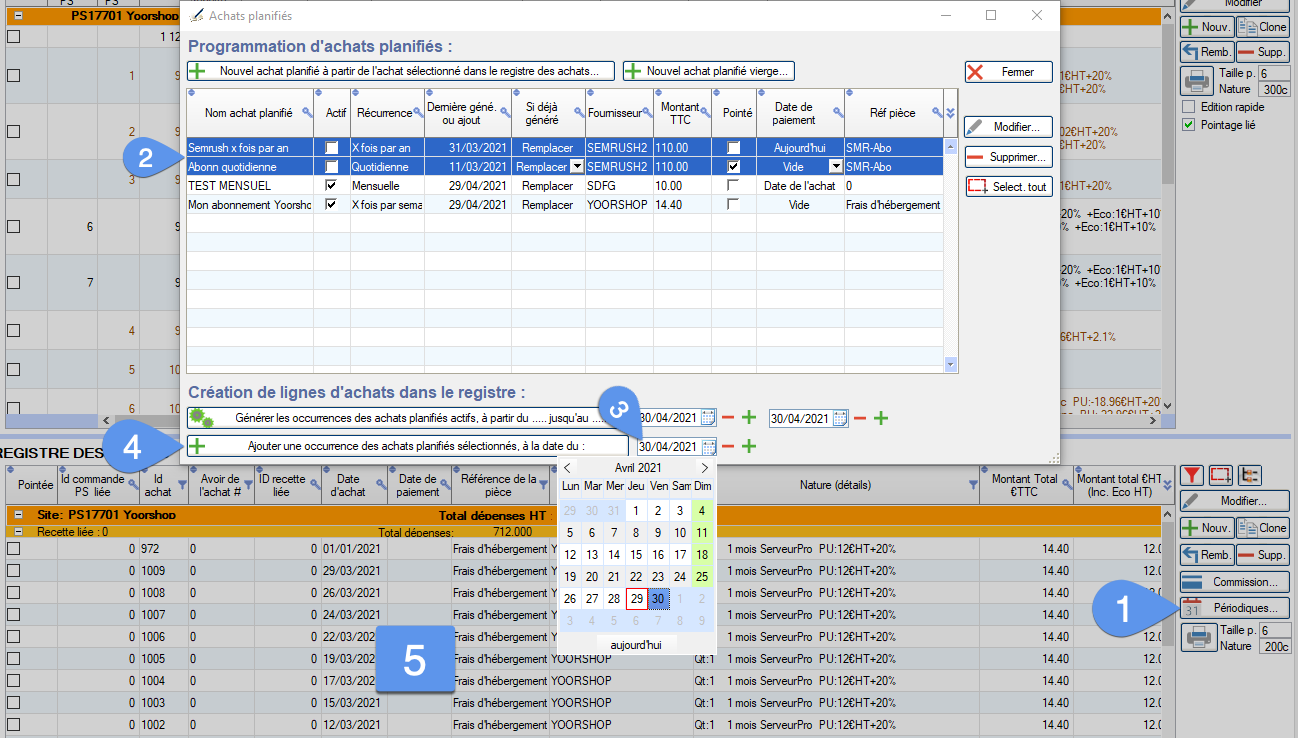
To manually add a single occurrence of various planned purchases, on a specific date:
- As before, start by opening the recurring purchases window.
- But this time select the lines of the planned purchases, for which you wish to generate a new occurrence.
- Choose the purchase date.
- Click on the button "Add an occurrence of the selected planned purchases, on the date of:"
- The purchase lines (one per planned purchase) are added (or replaced, ignored... depending on the setting in the "If already generated" column), in the expenditure register, on the requested date.
Category's other articles Managing your PrestaShop accounting
-
PrestaShop and accounting with or without VAT exemption
Guide
How to
Learn how to manage the self-employed accounting of a PrestaShop store with or without VAT exemption with an automatic management tool like AutoPresta
-
Creating and managing refunds and credit notes in PrestaShop
Guide
How to
Learn how to correctly reimburse all or part of your PrestaShop sales orders using accounting credit notes. Find out how to import them into your accounting register with AutoPresta